Thursday, August 28, 2025
Girlfriends Art Journal Page, a Blank Page Muse Post
Monday, April 29, 2024
Inspired By Pastel Card
Sunday, October 15, 2023
Stitching on Embossing
Hello! Welcome back to my blog. Today's card is part of the Kat Scrappiness Thankful 4 U Inspiration IG Hop. I added the link to the hop at the bottom of the post. I hope you can join us.
If you have been following me, you know that one of my joys in crafting is being able to stitch on my project. Today's card has stitching on it. I'll get to this later on the post.
I stamped the images from the Kat Scrappiness Thanksgiving Gnome stamp set on white cardstock. I colored the images using Prismacolor pencils. I die cut the images with the coordinating die.
For the focal point of the card, I am using the KS Thank You Word with Shadow Craft die. Instead of die cutting the detailed sentiment, I embossed this on a yellow KS Autumn Glitter paper. To emboss it, you need add a silicone mat to your die cutting machine sandwich, laying it underneath the paper to prevent the die from cutting the paper. I highly recommend lightly misting the paper with water to prevent the paper from cracking. Also, only do one pass of the embossing sandwich thru the die cutting machine. Running the paper back and forth through the die cut machine made my paper crack.
The nice thing about the KS Glitter paper is that it only has the look of glitter without the glitter. This makes sewing on it easy. Not to forget that there is less mess because of the faux glitter.
I adhered a scrap piece of cardstock to the back of the embossed glittered paper. This prevents tearing of the glitter paper as I poke holes on it. The embossed impression guided me on where to poke stitching holes. Poke holes on corners and adjust the spaces of the holes from these corners. The stitching holes does not need to be perfectly spaced from each other. Another tip is do not poke holes close to each other even if these holes are on different sides of the letter. Poke the hole a bit higher than the other. This prevents the holes from connecting because of a tear. If you cannot add a stitching hole to a part of the image, it is okay. The floss will cover this up.
I am using a DMC Variegated embroidery floss for stitching which works really well on projects like this since you never know in what part of the sentiment the floss will change color.
I die cut this stitched glitter panel using the shadow die. I die cut the shadow die on a scrap piece of cardstock first then used used the negative piece of the die cut in positioning the die over the stitched glittered panel. I used the scrap shadow die cut to add dimension to the embroidered die cut.
Saturday, July 1, 2023
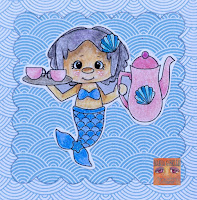
Waterfall Mermaid, Food & Drink Themed Card
Thursday, April 8, 2021
Adding Color to Ephemera (New Craft Stash #15)
Hello! Welcome to a New Craft Stash post. Today, I am featuring the Pinkfresh Studio Let's Stay Home Ephemera Pack. I also created this card to join in Pinkfresh Studio's latest blog challenge.
I created a background using strips of cardstock. I trimmed different colored cardstocks with the color palette of the challenge in mind. I trimmed the cardstocks in different widths.
I cut a typing paper at 3 3/4" x 8 3/4" and applied glue all over it. I adhered the strips of cardstock next to each other, repeating the pattern of colors until the whole typing paper is completely covered. I set this aside to dry with something heavy laying on top of it.
Once the panel is dry, I die cut it using the Pinkfresh Studio Slim Stitched Scallop Die.
I created a frame for the scallops by partially die cutting a gold cardstock with the scallop frame window on the slim die. I die cut this again using a circle die that is slightly larger than the stitching created by the slim die. I adhered this to the scallop windows carefully lining up the scallops and the mini dot openings created by the die.
After choosing the ephemera pieces for this card, I added color to the outline images with Prismacolor color pencils.
To assemble the card, I adhered the ephemera piece with the sentiment to the back of the center scallop window. I adhered this panel to a side folding white notecard. I adhered the floral ephemera pieces with foam adhesive.
Thank you for visiting my blog. Have a blessed, brilliant and creative day!
Maria Giselle B.
I am sharing this creation at
Monday, September 16, 2019
Teacher Inspired Letter Board Card
Hello! I created this card for several targets. First, we have a new challenge at Incy Wincy Designs, Back to School/Children. I am the theme selector and author of this challenge. I chose the theme so I can create a card for my 2nd Grader's teacher (which is my second target for this card). The Children theme was an add-on since not all of the DT has school-aged children. My last target for this card is to join in Sugar Pea Design's Mix-It Up Challenge.
One of our sponsors for the Incy Wincy Challenge is Cute as a Button. I printed the image on Neenah Solar White cardstock. I colored the image with Prismacolor colored pencils. I applied Stickles Christmas Red Glitter Glue to the apple, and Nuvo Apple Sour Glow Drops to the leaf. I set this aside to dry.
For the card panel, I die cut the letters of my sentiment using the Sugar Pea Designs Message Letter Board die. I die cut this on white cardstock since I plan to adhere the letters on top of each to create dimensional letters. This is the most tedious process in the creation of this card since the letters are small. Thanks to the tweezer and pick-up tool, it made the process a little bit easy. I also used a liquid adhesive to adhere the stacked letters. For the top layer of the letters, I used a gray cardstock.
I die cut the message board on a two-sided colored cardstock. I lined this up and cut the green piece diagonally, just like in the sketch. I die cut a blue cardstock at 4 1/4" x 5 1/2". I adhered the message boards to this blue panel. I die cut a red cardstock using the My Favorite Things Wonky Stitched Circle Stax Die-namics. I die cut the panel with the digital image using a My Favorite Things Circle Stax die. I adhered this on top of the red circle cardstock with a fun foam in between.
I adhered the letters to the message board more towards the right bottom part of the green message board. I adhered one of the letters on the red circle cardstock since I am running out of space. I adhered the circle panel where the circle is at on the sketch. I have a bit of an overhang which I trimmed off. The sentiment is too long to fit on the front of the card. So I stamped three dots to the end of the phrase, then added Nuvo Metallic Silver Lining Crystal Drops on top of the dots.
The white background of the digital image bothers me. Luckily, I have the same image printed on typing paper. I fussy cut this image right on the line. I adhered this on top of the colored image using a temporary adhesive. I blended Tim Holtz Distress Oxide Antique Linen around the digital image using the Picket Fence Life Changing Brush.
I added Ranger Glossy Accents to the eyeglasses. I adhered Doodlebug sequins on the diagonal portion of the message board.
For the inside of the card, I adhered the rest of the letters to complete the sentiment. I added dots the same way as I did on the front of the card.
This completes my card. I hope you like it. Thank you for visiting my blog. Have a blessed, brilliant and creative day!
Maria Giselle B.
Monday, March 5, 2018
No Line Coloring Using Color Pencils
I really like stitched dies. I die cut the colored panel using the largest Simon Says Stitched Rectangle die. But even if it is the largest die, the positive die cut is smaller than an A2 sized panel. Good thing, I was able to center the rectangle die over the colored panel, so I ended having an equally cut stitched border. I blended ink to this border carefully.
I adhered the positive die cut to a top folding white note card, using the border as a guide. Here is where my mistake comes, I adhered foam strips to the back of the border die cut. Lining it to the the positive die cut was a struggle because of the flimsy nature of the foam. I tried my best to line it up but I think I could have done a better job. The next time I do this type of card, either I should layer die cut cardstocks for the raised border effect, or I can layer several positive die cuts then use it as a guide to adhere the border.
Adding more accents, I applied clear Spectrum Noir shimmer pen to the You die cut. I also adhered sequin butterflies to the panel. I fold the butterflies first to give it a 3D look. I applied glue to the folded end using Tim Holtz Distress Matte Collage Medium. Once the glue dried, I applied a dot of Nuvo Glitter Drops Purple Rain to cover the hole of the sequin.
Monday, February 5, 2018
Color Pencil One Layer Card
We have a new challenge at Incy Wincy Designs Challenge Blog. The challenge is on Clean And Simple. This is the type of cards that I struggle a lot with because I am not sure if my card is clean and simple enough. I can't seem to resist adding embellishments to my cards. For this card, I focused on making it simple to keep the focus on the image. Speaking of which, coloring is the other struggle I have for this challenge. Our image sponsor is Createful Heart Digis. This image is called Story Time. They provided the images to choose from. I chose this image because it reminds me of my sister, who loves to read and loves cats. I was going to create this for her birthday last month but I didn't finish it on time for her special day.
I printed the image on Strathmore Bristol paper. Given this very detailed image, I used Prismacolor pencils to get to those small areas. Well, I did print it in a small scale and I also cropped the image. When I started this project, I am going for a one layer card.
After I colored the image, I added color details on the smaller areas with fine-tip markers that I have on hand. I embossed two metal dies from Simons Says Stamp to border the image and the edge of the card. I outlined the outer border with Versamark ink, then embossed it using a red Ranger embossing powder. I heat embossed the sentiment from Newton's Book Club stamp set using white embossing powder on red cardstock.
Monday, September 4, 2017
Digital Stamp Shaker Card
We have a new challenge at Incy Wincy Designs Challenge Blog. It is a Photo Inspiration Challenge featuring the photo below to be used as inspiration.


