Monday, May 26, 2025
Zhuzhed Vellum Butterflies, a Blank Page Muse Post
Thursday, May 1, 2025
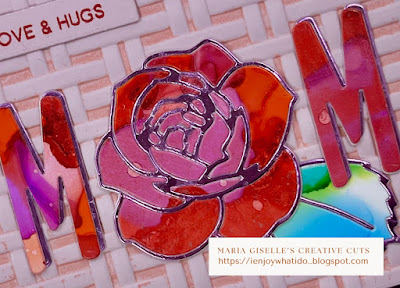
Alcohol Inked Alphabet
Sunday, April 27, 2025
Color Inspired Graduation Card
Tuesday, January 21, 2025
Negative Space Coloring
Monday, December 30, 2024
A Capy Holiday Card
Hello! Welcome back to my blog. Today's card was created for a person I work with who shares with me the same fondness for capibaras. She was nice enough to lend me her Capibara stamp and die set to play with. She has not even used these sets! To repay her kindness, I created this card using her stamp & die sets.
The stamp set has a birthday theme but it does not mean it cannot be used for other occasions. I stamped the stacked capibaras on a Copic friendly cardstock. I used Memento Tuxedo black ink which is a Copic friendly ink. I colored the images with Copic markers. I die cut the image using the coordinating die.
I die cut a cream carstock using a postage edged die from the Mama Elephant Peek a Frame Creative Cuts. I added dotted details to the edges of this panel using a die from the Lawn Fawn Stitched Borders die set.
I stamped the word Capy using the ME Inline Letters stamp set. I stamped the letters using the colors pink and green. Can you guess where I got my inspiration for the colors? (I will reveal the answer at the end of the post.) I used the Misti Stamping Tool to stamp the letters. I temporarily positioned the capibara die cut on the panel so I can space out letters evenly.
I stamped the rest of the sentiment on the panel. The stamp I used is from the ME Happy Everything stamp set.
I adhered the Capibara die cut to the center of the panel. I adhered confetti die cuts on the panel which I die cut on green and pink cardstock and patterned paper using the ME Confetti Creative Cuts.
On a 5 1/2" x 4 1/4" white cardstock, I stamped the diagonal stripes on the edges using the same pink and green dye inks I used for the letters. The stamp I used is from the ME Boutique Borders stamp set. I adhered the postage die cut panel to this panel.
I adhered this to a side folding A2 note card.
I hope you like today's card. Have a blessed, brilliant and creative day! Before I forget, my colors were inspired by the Wicked movie since I just recently watched it and I really love it!
Maria Giselle B.
I am sharing this project at
Wednesday, July 31, 2024
Lunar Animals One Layer Greeting Card
Sunday, May 5, 2024
Almost a One Layer Card
Monday, April 29, 2024
Inspired By Pastel Card
Friday, March 1, 2024
Interactive Birthday Card
Hello! Welcome back to my blog. We have a new challenge at Incy Wincy Designs. March's challenge theme is/are Birthday &/or Funny/Humorous. Please visit the challenge blog and see how the other DT members interpreted this month's theme. We also hope you join us in this month's challenge.
I am using an Art Impression's stamp and die set called Workout Gal. The final product has a moving element that I think the recipient will enjoy.
There are instructions on the packaging insert but if you are more of a visual learner, Laura Bassen's video is very helpful in using this product.
I colored my image using Copic markers. The set comes with two sentiment stamps, one of which I used on the card.
I blended ink on the sides of the colored panel. Just like in Laura's video, I matted the colored panel with a patterned paper before adhering it to a side folding A2 note card.
Tuesday, November 21, 2023
Cricut Cut Dog Shaped Ornament
Hello! Welcome back to my blog. Today's project was created for a friend, Linda, whose dog, Ollie, crossed the rainbow bridge. She has a vial encasing a snip of her dog's hair. She requested me to create something special with it.
I got this project's idea from a similar project I created for her a few years ago (More Cricut Cut Elves). I used my Cricut to create this dog. Luckily, there is a Bichon Frise file cut image in Cricut Design Space.
The image cuts the outline of the dog. I used the CDS Contour feature to create a solid cut for the backing of the dog. I also used this feature to create separate cuts for the dog's eyes, nose, lip and tongue so I can cut these pieces on a different colored cardstock.
Most of the pieces were cut on white cardstock. Without separating the positive and negative cuts of the dog, I colored the dog with gray Copic markers to add dimension to the dog. I adhered this to the solid dog piece.
I pieced in the eyes, the nose, the lips and the tongue to the digital cut. These pieces, except for the tongue, were cut on black cardstock. The tongue was cut on pink cardstock.
I added a heart to my Cricut Canvas. I resized this so it fits the dog's chest and it will fit the width of the vial.
To make it personalized, I added Ollie's name and today's year to the heart with the use of a foil pen. Cricut has a foiling pen accessory but I don't have one. Instead, I used the We R Memory Keepers Foil Quill tool to write on the heart.
Here is a link to the CDS file I used for this project, https://design.cricut.com/landing/project-detail/6557d2a6e00233f83add70a3, in case, you are interested.
It brings me joy when I make someone happy with my creations, especially if it is custom made. Thank you for visiting my blog. Have a blessed, brilliant and creative day.
 |
| Ollie |
Maria Giselle B.
I am sharing this creation at


