Monday, August 19, 2019

Using Die Cuts to Create a Background


Hello! We have a new challenge at Incy Wincy Designs on Musical Instruments and Singers. This challenge is close to me because my two sons are musically talented. My 18 year old is an all around wind instrumentalist (from clarinet, alto saxophone, bass saxophone, tenor saxophone, trumpet and trombone). And, my 13 year old is a percussionist.

I created this card with my 18 year old son in mind. I know the image is a female but it can also be a male, right? Anyway, my son is finishing up his Army Basic Training at Fort Jackson. He will graduate on the August 29. I cannot wait to see him and hug him.

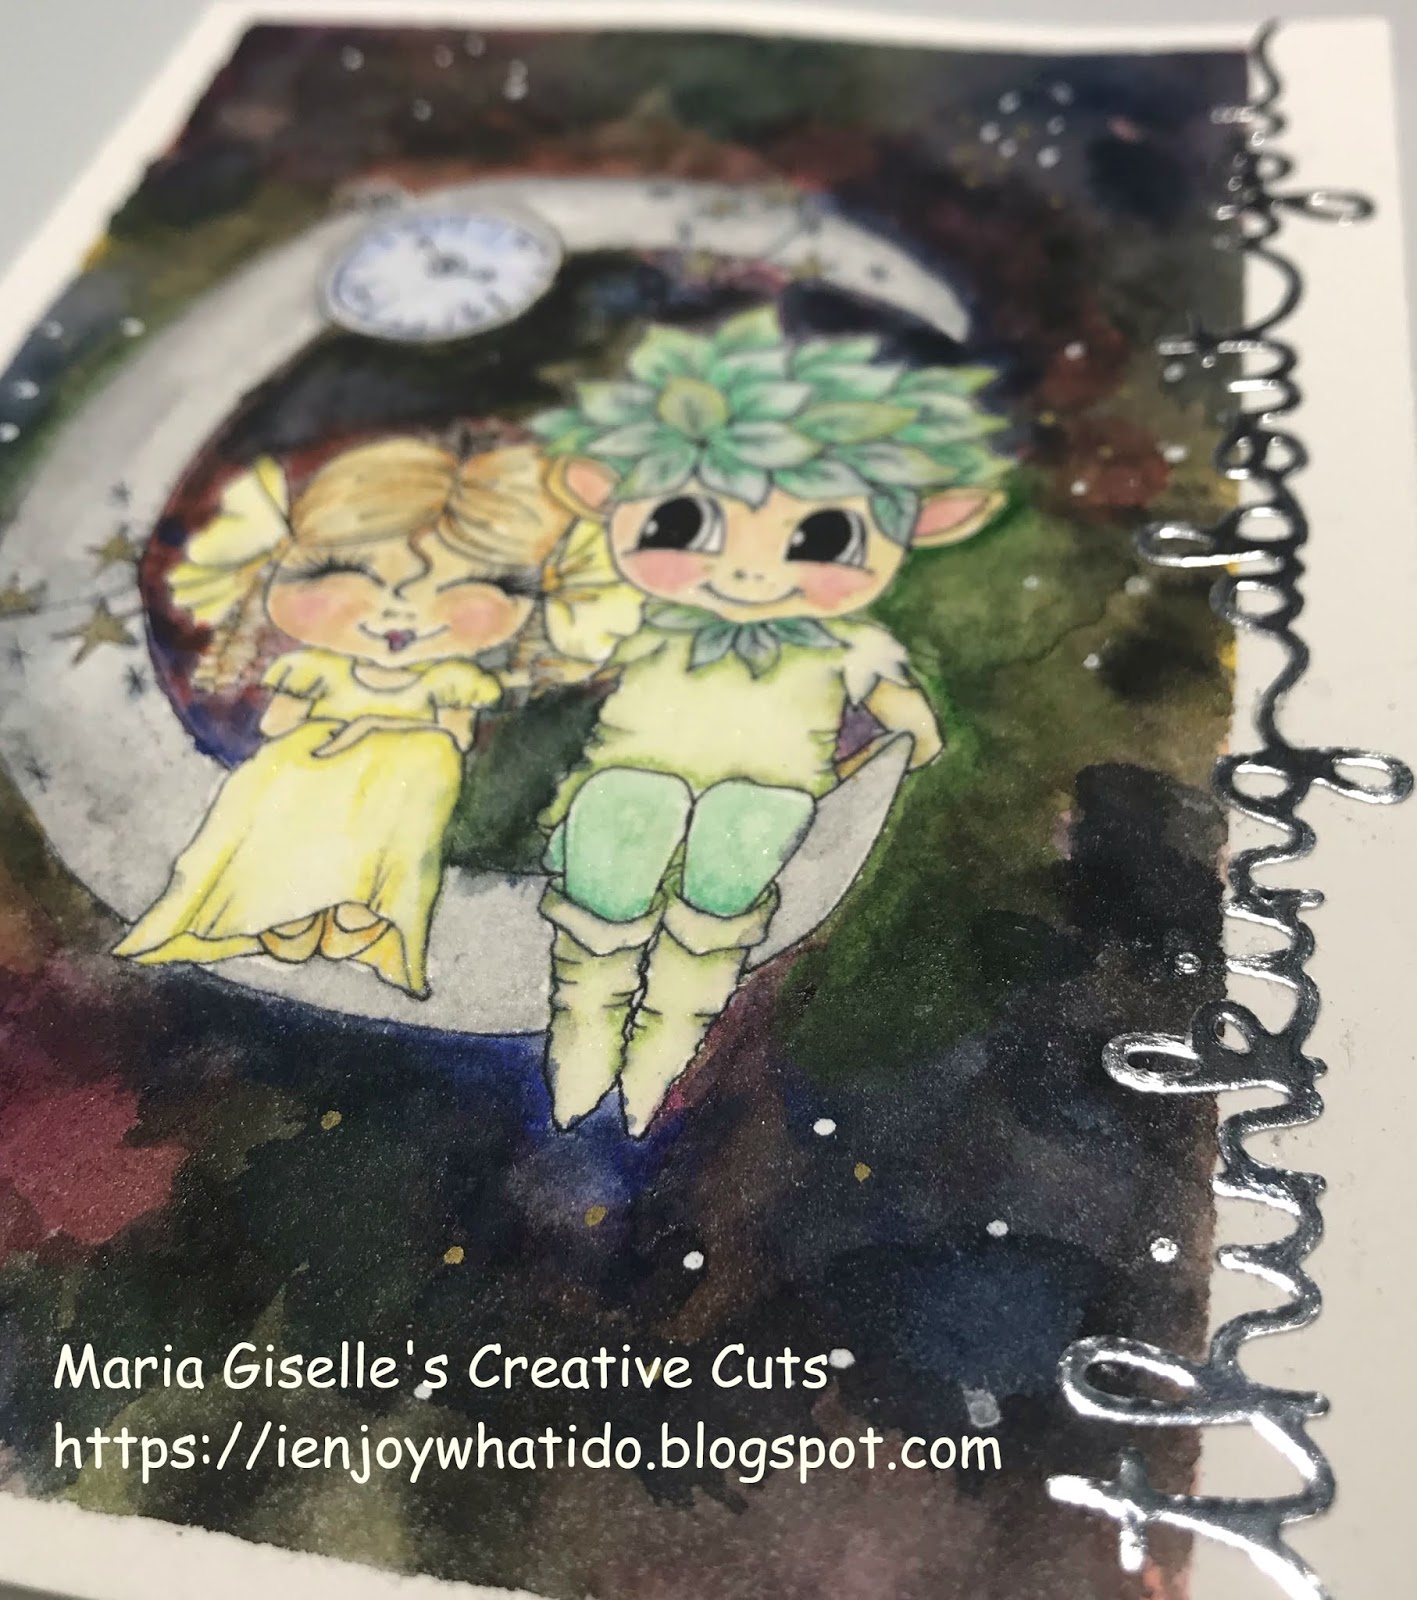
I printed the image on Neenah Solar White cardstock. I colored the image with Copic markers. The dog was colored with our dog in heaven, Speeder, as my inspiration. I remember when Rudy will hit the high notes with his clarinet, Speeder will howl at the same time.

I fussy cut the image, leaving a white border around the images. I colored the saxophone with a Copper Wink of Luna, blending out the color with the Clear Wink of Stella to mute the copper color. I made a copper mess while coloring. Got me upset since I am mostly done with the coloring. I used a   battery powered eraser which I bought at Hobby Lobby. Took off some of the colored blob. Some more detailing muted the mess. I fussy cut the image leaving a white border around it. This also helped with hiding the blob of copper. I used a craft knife to cut the spaces out.

I embossed an MFT Music Background stamp on a 5 1/2" x 4 1/4" Neenah Dessert Storm cardstock. I embossed this with Wow! Gold Pearl embossing powder.

For the frame, I die cut a window on a 5 1/2" x 4 1/4" black cardstock using a die from Mama Elephant Peek A Frame Creative Cuts. I die cut two of these panels and adhered one on top of each other.

I die cut the Paper Smooches Music Notes on a gold mirror cardstock. I adhered this to the black frame. I trimmed off the excess die cuts that are sticking out. I adhered some of these scraps to the open spaces on the frame.

I don't have a music related sentiment stamp. I thought about creating one using my alphabet stamp but it will take too much space. I bravely typed the sentiment on the kraft cardstock. I am glad it worked out.

I adhered the black frame to the kraft cardstock. I adhered the colored image using foam adhesives. I adhered this to a top folding white A2 note card.


I hope you join us in our latest challenge at Incy Wincy Designs. We cannot wait to see your creations.

Have a blessed, brilliant and creative day!

Maria Giselle B.


Saturday, August 10, 2019

Shaker Pull-Out Interactive Card


Hello! My son is going to his friend's birthday party. The mom is requesting for handmade cards instead of presents for the birthday celebrant. I asked what the celebrant likes. I incorporated three of the things she likes to this card which are a flower, a rainbow and glitter.

I die cut the Lawn Fawn Stitched Flower frame on Strathmore Bristol paper. I colored each petal using Zig Real Brush markers following a rainbow order. I had to add two more colors since there are nine petals. After this has dried, I added Nuvo Aqua Shimmer Glitter Gloss to the petals.

I die cut 2 circle acetates which size is slightly larger than the circle window of the flower. I adhered one of the acetates to the back of the colored flower. I added foam strips around this circle to create a well. I brushed the inner sides of the foam strips to lessen its stickiness. I poured various Martha Stewart seeds beads to the well. I sealed this with the other circle acetate.

For the card panel, I die cut the circle die from LF Outside In Stitched Flower die on a gray LF Knit Picky patterned paper. I kind of eyeballed where I die cut the circle.


I created the pull out mechanism afterwards. It is a bit complicated to try and describe the steps to create it. It took a bit of eyeballing and some adjustments. I am glad it worked! As you can see in the photos, there is a surprise message after the smiley face got pulled up. The hidden message is a sentiment from LF Love Letters.


I added more elements to the flower. I die cut the stem from kraft colored cardstock. I die cut the leaves from LF Knit Picky patterned paper. I folded the leaves at the center. I applied liquid adhesive to the back of the center area so I can keep the leaf folded for some dimension.

I added another sentiment by die cutting a white cardstock with LF Fancy Folded Banners. The sentiment is from LF Out of This World stamp set.


I added some gems from Pretty Pink Posh. And, I created a custom envelope. The card turned out to be 6" x 4 1/4" because of the pull tab. The scallop name tag is from LF Outside In Stitched Scalloped Rectangle die. The letters are cut using a Hero Arts alphabet dies.

Thank you for visiting my blog. Have a blessed, brilliant and creative day!

Maria Giselle B.

I am sharing this creation at


Monday, August 5, 2019

Digital Image on Galaxy Background


Hello! We have a new challenge at Incy Wincy Designs Challenge Blog. Our challenge is on Fantasy. We have two sponsors for this challenge. I am using an image from My Besties.

I bravely printed the image on watercolor paper using my Canon TS9512C wireless crafting printer. I said bravely because I plan to do watercoloring on this image. I was not able to print the image on a toner printer so I am using my inkjet printer. With inkjet printers, the ink reacts with water or liquid causing the outline to bleed. But I changed the setting to a photo setting hoping that it will avoid any bleeding. It actually worked except that I have to set the printed image aside for at least overnight. I figured this out since I started watercoloring the image after I printed it. I did not watercolor all of the image right away. That is how I noticed that the bleed is minimal after leaving the image overnight.


I started off with using watercolored pencils but later on switched to Kuretake Gansai Tambi watercolor due to the limited colors of my watercolor pencils. And I don't think I can achieve the galaxy effect using the pencils. I also used Tim Holtz Distress Ink Hickory Smoke and mixed it with Prima Color Blooms Storm Cloud for the moon.


I am going for a one layer card but printed the image turned out to be off center after I scored and folded the paper to create a side folding note card. I could have trimmed off the excess and made it center but I decided to use the space for the sentiment. I die cut a silver mirror cardstock using Lawn Fawn Thinking of You die. My card front is also warped from the watercoloring and drying with a heat gun. I placed this inside one of the tabs of the Sizzix Multi-Purpose Platform and ran it through the die cut machine just like I normally do with die cutting and/or embossing. It did not only straightened my warped card, it also pushed the sentiment die cut into the watercolor paper, leaving a leveled feel on the front of the card. It is actually kind of cool!

Thank you for visiting my blog. I hope you join us in this latest challenge at Incy Wincy Designs Challenge Blog. We cannot wait to see your work. Have a blessed, brilliant and creative day!

Maria Giselle B.


I am sharing this creation at


Travel Mini Album


Hello. I created this to take part of Pebbles' July Challenge with the theme on Travel. I don't have print-outs of our recent vacations. I am using what printed photos I have available which is our 2015 Summer vacation at Branson, while my sister was visiting from the Philippines.

I got my inspiration from a mini album in the Authentique blog. I tweaked the design a little bit since I have this 4 x 6 photos to work with.

This is a late post as well. And I did find out already that I am one of the two winners of the challenge by default since there are only two of us who joined in. What's so funny is that we both submitted a travel album. I guess, that is the most appropriate thing to create when it comes to travel theme.


My travel album is not done yet. I know I can add more embellishments and even more photos to it. It will be a project in progress as I add more elements to the travel album. What I really wish to have or be able to do is print varied photos in smaller sizes to create mini-albums which I think are more doable to finish than the large scrapbook albums.

Thank you very much for visiting my blog. Have a blessed, brilliant and creative day!

Maria Giselle B.

Sunday, August 4, 2019

Three Tags, Three Ways


I created this tag to participate in Pebbles Instagram Challenge on creating a tag using a tool. This is a late post. I submitted my creation to Pebbles first before featuring it here in my blog. I am so happy to share to all of you that I won first in the poll. It is very motivating, I tell you! Unfortunately, I am unable to link it here because the poll was done through IG stories. 
I created this tag using an old Pebbles Christmas collection, Merry, Merry. I used the 3 x 3 cut-apart sheet to be the focal image of the tag. I used a tag die from the Mama Elephant Framed Tags-Union Square die set. This die set enables you to cut a solid square tag, and at the same time, it allows you to cut a window with a cover that is cut on all sides except the top. Instead, this side is scored. 


I die cut a solid square tag and another tag with the window. Before I put the tags together, I stamped the solid square tag using a stamp from the Mama Elephant Confetti stamp set. I stamped this using a gold Tsukineko Delicata pigment ink. After this has dried, I adhered the 3x3 cut aparts to the solid tags. For the green tag, I adhered the window tag straight on, making sure it is aligned. For the ‘Deck the Halls’ tag, I die cut several window tags. I cut off the flap using a craft knife, then adhered this on top of each other to create a recessed look. And, for the snowman tag, I created it into a shaker card. 


To finish the tags, I threaded a thin ribbon through the tag hole. I die cut a white cardstock using Little B Handwritten cutting dies. I added a puffy sticker which is also part of the paper collection.
Thank you for visiting my blog. Have a blessed, brilliant and creative day!

Maria Giselle B.

I am sharing this creation at


Saturday, August 3, 2019

Snail Mail Inspired Interactive Card


Hello! Technology has invaded us in these present days. We communicate now through email, chat, text messaging, private messaging. But lately, with my son going to Army Basic Training, the only way for me to communicate with him is through letters. I was sketchy in my first letter. But as I continue to write to him every week, I remembered how much I love to write letters in my younger days. I would purchase and collect stationeries. I have pen pals back then. I write to my friends during the summer. I will put the letters I receive in a box. I also collect the stamps. It was fun! I really feel technology killed this skill, if you can call it that way.

I created a background using stamps from the Lawn Fawn Love Letters stamp set. I stamped on a Bazzill Taffy cardstock using a light gray dye ink from Close To My heart. I trimmed off the edges to create a 4" x 5 1/4" panel.

After I filled the panel with the stamped images, I die cut an envelope using a die from LF Happy Mail die set. I die cut this on a gray LF Let's Polka in the Meadow 6x6 pad. I scored the lines to close the envelope. I inked the edges using the same light gray dye ink I've used earlier.

I traced the rectangular opening of the letter die on a pink cardstock. I cut this out using scissors. I stamped a sentiment from the LF Love Letters stamp set to this using Hollyhock Close To My Heart dye ink. I adhered this to the inside of the letter die cut. I did not stamp my sentiment on the center. Instead of re-doing this step again, I stamped dash lines under the sentiment using a stamp from LF Tiny Tag Sayings and a dark gray Close To My Heart dye ink.


To close the envelope, I die cut several hearts using a purplish cardstock. The heart die is from the LF Happy Mail die set. I adhered this on top of each other to create a cardboard-like embellishment. For the top most layer, I die cut the heart from a pink Deco Foil Flock Transfer sheet. But before I did this, I adhered a double sided tape to the back of the flock, then ran it through the Sizzix Big Shot machine. To adhere it, I simply removed the backing sheet of the double sided tape. The letter would not closed shut so I applied a mini glue dot to the edge to keep it close. I wrote the word open on the heart with a Sakura white gel pen to let the recipient know that there is a hidden message inside.


I die cut a square window on the middle of the stamped gray panel using LF Square Stitched Stackables. To create some contrast, I die cut a square frame using two of the square stackables die. I die cut this on LF Perfectly Plaid 6x6 paper.

I embossed stitched lines on a 4 1/4" x 5 1/2" pink cardstock using Li'l Inker Designs Quilted Stitched Pattern Die. I adhered the gray patterned panel to this. I adhered the frame next, then the letter die cut.


I heat embossed another sentiment from the LF Love Letters stamp set on a black cardstock strip. I embossed this with Hero Arts white embossing powder. I trimmed this to a strip using a craft knife. I adhered this to the front of the card.

Thank you for visiting my blog. Have a blessed, brilliant day!

Maria Giselle B.

I am sharing this creation at