Wednesday, March 29, 2023

Floral Apron Shaped Card


Hello! Welcome back to my blog. If you have been following me, you have read in my previous post how I went into a crafting slump last week. I am glad to finally break out of it! I was able to do more crafting this week than last week.

Today's project was inspired by Honey Bee's March's FB Challenge. I linked the challenge below, in case you are interested to join.

I got this Honey Cuts Apron A2 die as one of the crafty items I purchased from a crafter's fundraiser destash. I am not familiar with the die so I went to the Honey Bee website to see project samples using this die. I die cut four pieces of the apron on cream cardstock. 

The die set comes with the die to cut the neck piece. I cut four pieces of this on red cardstock. 

The die set also comes with a die that will cut a folding piece to make this into a card. I die cut this piece on a heavy weight vellum, and gave it a good score using the scored line created by the die.

I embellished the apron with die cut tulips. The layering dies I used for the tulips is from Honey Cuts Lovely Layers Tulip die. I used the tulip bud for this project, cutting the layers on different colors of cardstock.

I adhered the tulips buds to the apron.

The apron die cut comes with two slits to slide the neck piece through. I slid the red neck piece die cut to the flower embellished apron. The ends of this neck piece just needs to be slid through about 1 cm. If you push it through further, the curved portion of the neck piece die cut will curve upwards. I used a strong double adhesive tape to adhere the ends to the back of the apron. 

To make this into a card, I adhered the folding piece to the back of the flower embellished apron, avoiding the score on the vellum. I adhered the other apron die cut to the other half of the folding piece.

To have a finished look, I adhered another neck piece die cut to the back of the neck piece that is adhered to the front of the card. I repeated the process on the back apron die cut, making sure the neck pieces are all aligned. 

I trimmed a sliver off the side of the other two apron die cuts. I adhered this to the inside of the apron card.


I stamped a sentiment to the inside of the card using a sentiment stamp from the Honey Bee You Bake Me Happy stamp set which unfortunately has been retired. Despite this, I think a lot of sentiments that can work with this card.


Thank you for visiting my blog. Have a blessed, brilliant and creative day!

Maria Giselle B.

I am sharing this creation at


Thursday, March 23, 2023

Rainbow Tiled Card


Hello! Welcome back to my blog. My busy crafting schedule for the past weeks left me on a slump this week. I have more than one card planned to create this week but fatigue set in, slowing me down on a lot of stuff including creating this card. I almost gave up on this card because nothing seems to be working the way I envisioned it. Even up to the point that the card is all done, something just not seems right. This post is not only about creating this card but also on how I did not give up on myself during this down time.

I am using the Altenew Patchwork Tiles stamp set. I positioned the stamp on the Misti Stamping Tool so I can just move the cardstock panel to repeatedly stamp the image on a straight line. I stamped the image on vellum to have a frosted effect. I used different colors of Tim Holtz Distress Oxide, following a rainbow order. Using the Misti helped in re-stamping the image especially if the impression was not perfect the first time.  Since I heat embossed the images, I prepped the area with an anti-static tool first before stamping the image. I used clear embossing powder which made the color of think darker, getting a more tile look. Some areas are still not perfectly stamped. It seems like there is an area wherein the ink won't transfer to the vellum despite multiple stamping. I am not sure if my now non-sticky mat that's causing this. 

I colored the back of the vellum with Copic markers following the color of the tile to add color to the tiles.

Now is when the fiddling starts. I can't seem to decide what to do next. To find inspiration, I search the internet for cards using vellum and take it from there. I settled with a framed card. I used a square die from the Kat Scrappiness Never Ending Square dies to cut the square opening on a 4 1/4" x 5 1/2" white cardstock panel. I created three pieces of this framed panel. I adhered the vellum panel on top of one of the frames. I adhered the other two on top of each other, then adhered it on top of the vellum piece. 

I added color coordinating sequins to the center of each tile. To cover the sequin hole, I added Nuvo glittered drop to the centers of the sequins. 

For the sentiment, I die cut the Birch Press Design Big Thanks Sugar Script Craft die. I chose this die sentiment because its length and size are perfect for the bottom space of the frame. This was not my first choice for the sentiment on this card making adding one more thing to my struggles creating this card. 

I die cut the sentiment three times on black cardstock. I adhered the three die cuts on top of each other for a dimensional look, then adhered it to the bottom space of the frame without taking a test look first. I cringed when I saw how the black sentiment stole the eye away from the colored tiles. Another struggle on with this card. It is at this point that I wanted to try and removed the adhered die cut but I know with the quality of liquid glue that I used, most likely I am going to warp that area. I walked away from my crafting space before I do more harm to the card. Talking it out with my sister, telling her why I don't like how the card looks made me come up with a plan on how to fix it. This time, with a little bit of confidence, I know I am going to get it right. I die cut the sentiment on a pearl shimmery white cardstock. I adhered it to the black stacked sentiment die cut, slightly offsetting it. Yes! I finally like how the card looks.


Thank you for baring with me with this post. I just want to let you know that a crafting slump can happen without warning, and it is okay. It is just like any struggle in life that comes our way. How we deal with the struggle is what matters in providing outcomes. I am hoping my crafting slump is just short lived. We shall see. 

Have a blessed, brilliant and creative day!
Maria Giselle B.

I am sharing this creation at


6/2024: Altenew decided to change its affiliate program starting this month. Below is my affiliate link to the website. I don't think I can directly link the products I used with this new program. Please feel free to do a product search. I will update as I figure this out. The good thing about this new affiliate program is that I get to earn on each Altenew product you purchase and not only on the product/s I used on this project. As before, there will be no additional cost to you if you make a purchase. It is just a way to help a fellow crafter sustain her love for crafting. While in the Altenew blog, don't forget to check out their new release for this month. Thank you for your support!


Monday, March 20, 2023

Altenew March 2023 Marvelous Monthly Series Release Blog Hop #2 + Giveaway ($300 in Total Prizes!)


Hello! Welcome back to my blog. Today's post is an extra special one for I am taking part in Altenew's Marvelous Monthly Series Release for March. Eeek! I can't believe it myself. Anyway, I am glad you came my blog's way. I hope you like the cards I created featuring the Mini Delight: Cafe' Au Lait Dahlia stamp set and coordinating die set. I rarely use silhouette stamps because I don't get good stamped impressions with these kinds of stamps. Thanks to the Misti Stamping Tool, this is not a problem anymore. In fact, there are many techniques you can do with silhouette stamps. The cards I created show some of these techniques.

For my first card, I added shading to the stamped image. I used a light-colored dye ink and also used second generation stamping for the image. I don't want the stamped image to be too dark that it will be difficult to add shading to the image that's why I used second generation stamping.    

For the second card, I stamped the image over a blended ink blended background using a black dye ink. This technique is very common these days. I masked the top and bottom portions of the panel. The masking paper was die cut with a deckled rectangle die. You can use shaped mask to add a blended image. You can also have the silhouette image stamped beyond the blended background. Lots of potential with this technique, a technique I learned from one of the AECP 2 courses on Masking Unleashed. Creating backgrounds with masking is one of the classes in this course. 

For the third card, I stamped the flower on a different colored cardstock. I stamped the flower using a coordinating color of Tim Holtz Oxide ink. Just make sure the cardstock is lighter in color than the Oxide ink or else the flower will not be visible. Another option is to heat emboss this with clear embossing powder. Heat embossing makes the color darker than its original tone. I die cut the flowers using the coordinating die. 


To save time from trying to find the matching points of the stamped flower with the die, place a dot on one of the most prominent flower tips of the die with the use of a marker. On the plastic sheet that holds the stamps, on the printed side, put a dot on the side of the flower tip that matches the tip of the flower where the metal die has a dot as shown above.

I also stamped the leaves in the stamp set and die cut the leaves with the matching dies. I created a background panel using the flowers and leaves die cuts. 

Which of these techniques did you like? Do you have any other silhouette stamp techniques?

As a recap, below are the links related to this release and blog hop:

Don't forget that you can subscribe monthly to one or more of the product bundles in this release. Suit your crafting needs. 

And the best part of all is...
Giveaway Prizes


$300+ in total prizes! To celebrate this release, Altenew is giving away a $100 gift card to 1 grand prize winner and a $20 gift card to 10 winners! Please leave a comment on the Altenew Card Blog and/or each designer’s blog post on the blog hop list below by March 26, 2023 for a chance to win.


Altenew will draw 5 random winners from the comments left on each stop of this blog hop and announce the winners on the Altenew Winners Page on March 28, 2023. *The grand prize winner will be chosen from comments left on the Altenew Card Blog.

Thank you for visiting my blog. Have a blessed, brilliant and creative day!

Maria Giselle B.

You are invited to the Inlinkz link party!

Click here to enter 

6/2024: Altenew decided to change its affiliate program starting this month. Below is my affiliate link to the website. I don't think I can directly link the products I used with this new program. Please feel free to do a product search. I will update as I figure this out. The good thing about this new affiliate program is that I get to earn on each Altenew product you purchase and not only on the product/s I used on this project. As before, there will be no additional cost to you if you make a purchase. It is just a way to help a fellow crafter sustain her love for crafting. While in the Altenew blog, don't forget to check out their new release for this month. Thank you for your support!

Friday, March 17, 2023

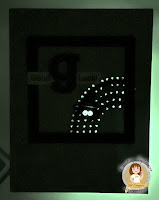
Wobbly Glow in the Dark Spider Leprechaun

Hello! Welcome back to my blog. I thought St. Patrick's Day was last week because of the parade held in our downtown. When I realized that St. Patrick's Day is this week, I thought, why not give the spider a chance to celebrate it too, right? I hope you are not getting sick of my spider cards. I truly enjoy creating different occasional scenes for this spider. Not that I like spiders. I am terrified by the big, fuzzy ones. Otherwise, I believe that spiders are good for the environment.

I started off with partially die cutting a rainbow stitching die to a light green cardstock panel cut at 4 1/4" x 5 1/2". I added stitching to the rainbow, not really following a sewing pattern since it will mimic a rainbow web weaved by the spider.

I die cut the spider using a die from the Kat Scrappiness Creepy Crawly die set. I die cut this on black cardstock. I die cut extras for the eyes, and to layer the spider for dimension. I snipped off the string attached to the spider which is part of the die cut. 


I die cut a hat on green glittered cardstock. I die cut the trim using a black cardstock. For the buckle of the trim, I free hand cut this on glitter mirror cardstock and black cardstock. Big thanks to my craft tweezers, my sharp pointy scissors and my reading glasses. Without these items, cutting these hat embellishments won't be possible. I adhered the trim and buckle to the hat, then adhered it to the spider. I added Nuvo Glow in the Dark on the spider's eyes. I set this aside to dry. I added a dot of Ranger Black Enamel Accents to the eyes. 

I created a green frame using two squares from KS Never Ending Square die set. I used a dark green cardstock for the frame. I added stitching details on the top and lower portions of the frame with a die for some interest.

For the sentiment, I heat embossed a letter g on a green cardstock. I fussy cut this leaving a small border around it. I also cut the inside of the letter g with the use of a craft knife and a small pointed edged scissor. I applied shimmer to the inside of the letter g. I didn't like how it looked so I repeated the process using vellum this time. I added dots of glue to the fussy cut g cardstock, over the embossed lines then adhered the fussy cut g vellum over it. 

For the sub-sentiment, I heat embossed this on white cardstock strips using gold embossing powder. I created a larger space in between the letters by masking one of the words before inking the stamp, then changing the mask to a new one before stamping the inked word to a strip of cardstock. I repeated this with the other word. In this way, the letter g will not be covered by the sentiment.

For the background, I created a mask using a Post-it note. I cut this the same size as the inner frame. I stamped clovers all over this background using second generation stamping with a Neon Green dye ink. I stamped the clovers again using white pigment ink.


I adhered the above elements to the front panel of the card except for the spider. I wanted the spider to be interactive. The mini action wobble is too big for the spider. I have googly eyes with springs on it in my stash for a very long time. I always forget to use it. This is the perfect opportunity to use it. I had to remove the googly eye since I only need the spring. I adhered the spring to the back of the spider using Ranger Glossy Accent. I also used this to reinforce the glue on the other end of the spring. Below is a video showing off the springy action of spider leprechaun. I hope you like it.


I adhered this to a top folding A2 note card.

Thank you for visiting my blog. Have a blessed, brilliant and creative day!
Maria Giselle B.

I added below a link to the Kat Scrappiness products I used on this card. There will be no additional cost to you should you decide to purchase this/these product/s. While you are at the Kat Scrappiness website, do check out their wide array of products especially the exclusive Kat Scrappiness products. They have a new release, too! 

I am sharing this creation at


Tuesday, March 14, 2023

Altenew Celebrating Parents Card Drive 2023 Blog Hop + Giveaway ($200 in Total Prizes!)


Hello! Welcome back to my blog. I am part of Altenew's Celebrating Parents Card Drive Hop. Altenew is hosting this card drive from 2/28/2023 to 4/17/2023. This card drive aims to honor and celebrate the fantastic parents and parental figures in our lives. Altenew will also donate $1 with every order from this collection (from 2/28/2023 until 5/14/2023) to the Food Bank of Central New York to support seniors in need. Details on how to participate in this drive is linked above. There is also a chance to win a $15 gift card to the Altenew store which is all detailed in the Altenew Card Drive blog.

I lost my parents in less than a year. My Amang (father in Filipino) last September 2021, and my Inang (mother in Filipino) last August 2022. It still hurts each time I face this realization but I find comfort in knowing that they are together and believing that a part of them is who I am right now.

The cards I created are also made in fulfillment of the AECP 2 courses. I will explain this later on in the blog.


My first card is a masculine themed card. I did an ombre embossing technique on the star which is one of the classes in the AECP 2 course on Impressive Heat Embossing. The star is from the Altenew Halftone Star stamp set. The trick to get a flawless ombre embossing technique is to use a stamping tool like the Misti which is very helpful with repeated stamping.

I added stitching to create a frame for the star. The stitching holes were created using the Altenew String Art Rectangle die set. The sentiment is from the same stamp set but I added the word 'rock' which is from the Altenew Label Love stamp set.


The next two cards are feminine floral cards. I am using the Altenew Sixties Sunshine bundle which includes a stencil set and a 3D embossing folder.


I traced the stencil on a cream cardstock using a brown gel pen, a technique inspired by the AECP Magical Marker Techniques course. The class is about drawing with stencils. To fill the background, I traced some of the flowers using a gold glitter pen. I created a holding paper for the cardstock, sort of like a jig, to temporarily adhere the cardstock I will be drawing on. I taped the stencil to this holding paper so it will not shift. Since I was using a gel pen, I traced the images slowly. 

The embossing folder pattern matches the pattern created by the stencil. I lined up the pattern of the embossing folder with the doodled pattern, then ran this through the embossing folder. I added color to the flowers by blending ink on the printed side of the embossing folder, then ran this through the die cut machine. I repeated this process for every color. Just make sure you are lining the right embossed image to the embossing of the folder. My embossing and inking are not perfect but I like it this way since I am going for an organic look. 


I am so amazed by this embossing folder that I created another card using an orange cardstock. I tried swiping a white dye ink to the embossing folder to lighten the color of the recessed areas of the card panel. I should have used a white pigment ink instead of a dye ink for a more dramatic effect. Something to think about later on. I blended a brown dye ink on the centers of the flowers for a bit of shading. I flicked Tim Holtz Distress Oxide sprays on the panel. I added stitching to the panel to tie up with the stitched sentiment.

For the sentiments, I heat embossed this on kraft cardstock. The sentiment is from Altenew Wild Hibiscus stamp set. I added stitching holes to frame the sentiment using the same die I used on the masculine card. I adhered this to the center of the embossed panels with foam tape. 

I trimmed a bit off the sides of these embossed panels. I adhered this to a vertical top folding A2 kraft note card. 

I hope you join Altenew's Card Drive. Let us show love to these parents through the power of cardmaking. Have a blessed, brilliant and creative day!

Maria Giselle B.


Giveaway Prizes

$200 in total prizes! To celebrate this release, Altenew is giving away a $50 gift certificate to 2 lucky winners and a $20 gift certificate to 5 winners! Please leave a comment on the Altenew Card Blog and/or each designer’s blog post on the blog hop list below by 03/20/2023 for a chance to win. Altenew will draw 7 random winners from the comments left on each stop of this blog hop and announce the winners on the Altenew Winners Page on 03/21/2023.


You are invited to the Inlinkz link party!

Click here to enter

6/2024: Altenew decided to change its affiliate program starting this month. Below is my affiliate link to the website. I don't think I can directly link the products I used with this new program. Please feel free to do a product search. I will update as I figure this out. The good thing about this new affiliate program is that I get to earn on each Altenew product you purchase and not only on the product/s I used on this project. As before, there will be no additional cost to you if you make a purchase. It is just a way to help a fellow crafter sustain her love for crafting. While in the Altenew blog, don't forget to check out their new release for this month. Thank you for your support!


I am sharing this creation at:

Monday, March 13, 2023

Altenew March 2023 Marvelous Monthly Series Release Preview #4


Hello! Welcome back to my blog. Congratulations! You have reached the last product preview of Altenew's mid-month release. This bundle includes a stamp set, a coordinating die and a coordinating stencil. Do you have a favorite so far? Don't forget that this bundle and the rest of the products in this release will be available for purchase on March 17. Just four more days! 

Keep an eye out on Altenew's social media platforms for hops featuring different artists and how they used products from this release. 

Thank you for following my blog posts featuring Altenew's release. It was such a great opportunity to be a part of this release. I enjoyed my journey, and I hope you did too. Have a blessed, brilliant and creative day!

Maria Giselle B.

The release won't be available until March 17 but as early as today, you can add the products in this release to your wish list. I added below the links to the products in this release. There will be no additional cost to you should you decide to purchase these product/s when it goes live. It is just a way to help a fellow crafter sustain her love for crafting. Thank you for your support!

Sunday, March 12, 2023

Banner Shaped Mini-Card Front

Hello! Welcome back to my blog. Today's card features products from Kat Scrappiness. I created a shaped mini-card front. The kraft cardstock is just a panel that holds the mini-card. 

I began by die cutting different shades of green cardstock and a gold cardstock using the KS Stitched Slimline Strips dies. I adhered this to a typewriter paper which was cut a bit larger than the banner die that I used on this card. I made sure that the strips are flushed next to each other. I also created an order of adhering the strips. I die cut this using a die from the KS Nesting Fishtail Banner dies. 


To create the mini note card, I am using a top folding white A2 note card. I positioned the banner die a bit above the scored line of the note card. I ran this through the die cutting machine. I adhered the striped banner die cut to the front of this mini note card. I stamped a sentiment to the inside of mini-card.


To embellish the front of the card, I die cut letters on gold mirror cardstock to spell 'Daddy.' I adhered another set on plain cardstock, and adhered this to the back of the letters for some dimension.

I die cut the word 'Hi' on white cardstock. This die is part of the KS Nesting Fishtail Banner dies. I also die cut an extra one and adhered it together for dimension. Instead of using the tiddle, I die cut the smallest star from the same die set. I also die cut this twice and adhered one star over the other.

For the subsentiment, I heat embossed this on white cardstock and die cut this into a strip. I also die cut extras and adhered it on top of each for dimension. I used Versamark ink for stamping and Wow! Metallic Gold Rich Super Fine embossing powder. 

I adhered all of die cuts on the front of the striped mini-notecard. I added more star die cuts and small star sequins.

For the mini card holder, I trimmed a kraft cardstock at 4 1/4" x 5 1/2". I embossed this panel using the KS Buffalo Plaid Background die. To achieve this look, you will need an embossing mat. Depending on your machine, you might need to add shims to get a good, embossed impression.

I swiped the Versamark ink on the edges of the panel. I poured the same embossing powder to these areas then heat set it. 

I adhered the mini card to the panel.


Thank you for visiting my blog. Have a blessed, brilliant and creative day!

Maria Giselle B

I added below a link to the Kat Scrappiness product I used on this card. There will be no additional cost to you should you decide to purchase this product. While you are at the Kat Scrappiness website, do check out their wide array of products especially the exclusive Kat Scrappiness products. They have a new release, too! 

I am sharing this creation at