Thursday, June 23, 2022

Paper Strips Background Panel Greeting Card

Hello! Welcome back to my blog. For today's card, I am inspired by several blog challenges that I combined the ideas in this card. 

  1. Scrapbook & Cards Summer Issue Colour Challenge
  2. Pinkfresh Studio June Challenge
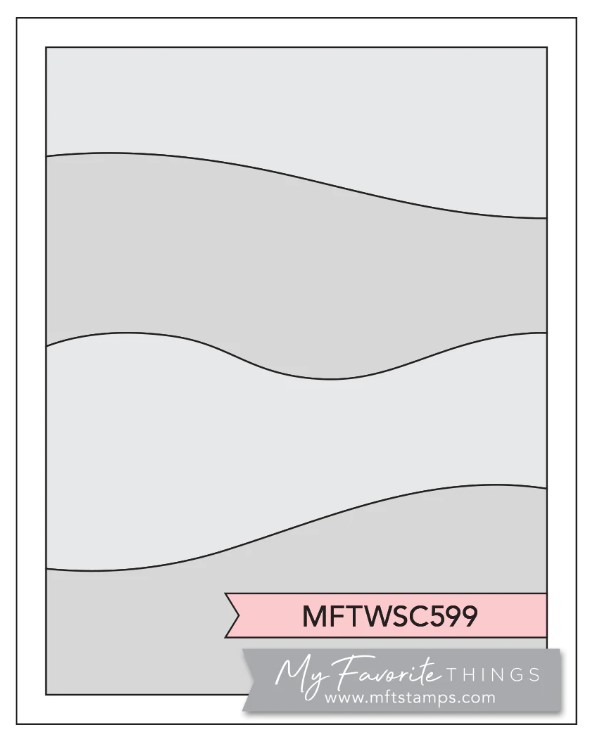
  3. My Favorite Things Sketch Challenge. 
The above challenges are linked below just in case you are interested to join.

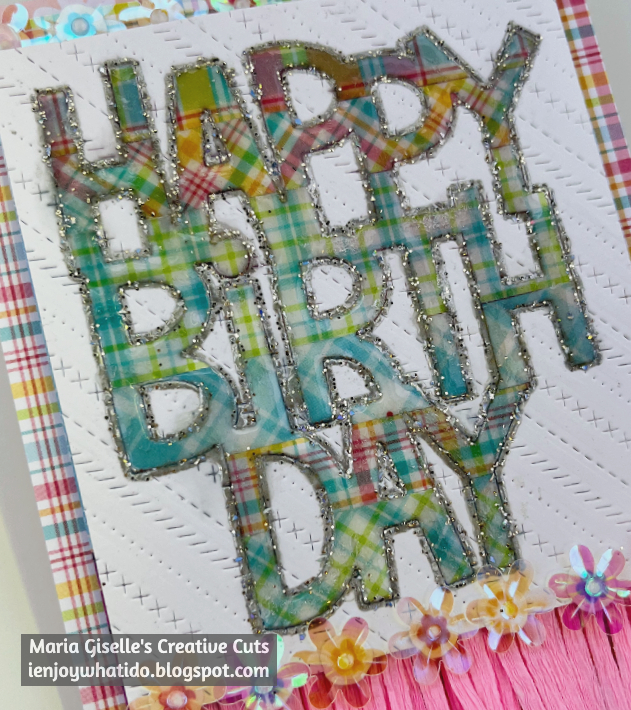
Back to card, I looked through my cardstock stash and pulled out cardstock colors close to the bold rainbow colors of the Scrapbook & Cards Colour Challenge. I trimmed these at 1/4", about 3-4 pieces per color. I trimmed a lightweight white cardstock at 4 1/4" x 5 1/2". Using the lines of my grid mat, I located the center of the short side of this white cardstock panel. I started adhering the cardstock strips from the middle, starting with yellow, then green, then blue, so on and so forth. I continued this process until I filled up the whole white cardstock panel. I set this aside to dry with something heavy placed on top of it. I trimmed off any excess hanging over the white cardstock panel.

I prepped this panel with anti-static powder tool. I stamped the Hero Arts Novel Prose Bold Prints using Wow! Clear Ultra Slow Drying Embossing ink. I poured clear embossing powder to this, and heat set it.

I die cut eight pieces of the Pinkfresh Studio Lacy Floral die on white cardstock. I adhered one die cut on top of the other for a dimensional look. I adhered this to the rainbow panel. After this has dried, I trimmed off the excess hanging over the side edges.

I die cut the frame using My Favorite Things Snow Drifts Cover Up Die-namics on white cardstock and on Graffix Platinum sheet. I snipped off the wavy lines on the center created by the die. I adhered the white frame to the back of the platinum sheet. You can easily re-created this frame using a nesting rectangle die. Depending on how skinny you want your frame, choose the two rectangles from the die set.

For the sentiment, I am using a stamp from PS My Favorite Things To Say stamp set. I prepped a vellum with anti-static powder tool. I stamped the sentiment using red dye ink. I poured red embossing powder to this, then heat set it. I trimmed this to a strip. I doubled the vellum to make the sentiment stand out since the vellum will be less opaque. I did this by trimming another vellum strip, the same size as the sentiment strip. I ran this strip through the Xyron Sticker Maker machine, then adhered it to the back of the sentiment vellum strip. I adhered this to the frame, taking note of its placement over the flowered panel. I snipped off the edges on the side. 

Since the frame is somewhat flimsy, I positioned it back to the metal die. It fits back perfectly! I applied liquid glue to this, then using the metal die as a guide, I positioned the metal die over the flowered panel, then lift the metal die off leaving the frame perfectly placed on the flowered panel. I set this aside to dry with something heavy on top of it.

I added colored clear sequins from Doodlebug and Sparkling Clear Confetti Mix from Pretty Pink Posh to the open areas on the panel. I added Nuvo White Blizzard Glitter Drops over the hole of the sequins. I set this aside to dry. 


Thank you for viewing my blog. Have a blessed, brilliant and creative day. 

Maria Giselle B.

I am sharing this creation at


Tuesday, June 21, 2022

Pop Art Greeting Card


Hello! For my 4th AECP card, I created a Pop Art inspired greeting card. The layout and colors of my card are inspired by the card shown on the photo below. 

Inspiration Credit

I love the colors of the keyboards on the card that I was inspired to re-create it using stamps from Altenew Happy Birthday To You stamp set. I also like its simplicity and for it not being gender specific. 

I trimmed different colored cardstocks at 1" and 1 1/2". The music clef stamp is 3/4" height which will perfectly fit on the inch cardstock. For the 1/2" length, just like the inspiration card, I want the colored cardstocks laid from left to right of the card. I could have used an A2 card but it will be more of a hassle to divide 4 1/4" into three. Thus, I created an A6 card which is 4 1/2"  wide, when divided into three is 1 1/2". 

Using the Misti Stamping Tool, I stamped the music staff on each colored cardstock using Tim Holtz Distress Oxide Inks:

  • Picked Raspberry on yellow
  • Wilted Violet on blue
  • Candied Apple on green
  • Prize Ribbon on orange.
I heat set this to speed dry it.

I stamped the music clef and notes next using the same inks, and also with the use of the Misti Stamping Tool. This time, I prepped the area with an anti-static tool, stamped the images, poured clear embossing powder to it, then heat set it. 

Once I am all done, I trimmed a white cardstock into 9" x 6.25". I scored it on the long side at 4.5" to create an A6 card. I adhered the embossed colored cardstocks. For some variation from the inpiration card, I adhered gold cardstock strips on the top and the bottom of the colored cardstock collage, to give it an outline. Another variation I made is I stamped a sentiment on the front of the card. The sentiment is also from the same stamp set. 


To complete the front sentiment, I stamped the rest of the sentiment inside the card. I am planning to give this to my son who's birthday is next month but you can easily customize this card to any occasion. 


This is a very simple card, not quite a single layer but can be re-created into a single layer card. Instead of using colored cardstocks, you can do masking and ink blending to achieve the same look of colored backgrounds for the music images. 

Thank you for visiting my blog. Have a blessed, brilliant and creative day!

Maria Giselle B.


Saturday, June 18, 2022

Father's Day Scene Card

Hello! Welcome back to my blog. Father's Day is right around the corner. I created this card for my husband, the father of four boys. He might still be out of town on Sunday. At least, card is already made. 

Today's Lawnfawnatics challenge is truly a challenge for me. The only stamp that I have which suits the theme of Beach vs. Mountains is the LF Dad + Me stamp set. It has a mountain stamp which was perfect for the scene that I created. The nice thing about LF products is that you can mix and match the products to create a story, which is what I did on this card. 

I stamped the images that will make up my scene on white cardstock. I did partial stamping on the mountain and the tree since these stamps have solid parts on it. I used the Misti to do partial stamping. I inked the solid part of the stamp with brown for the mountain, and green for the tree. I inked the peak of the mountain with gray ink and used brown ink for the tree stump. I fussy cut the images leaving a thin white border around it. 

I stamped the bears on white cardstock. The bear stamps are also from the LF Dad + Me stamp set. I colored the bears with Copic markers. I fussy cut the bears leaving a white border around it. I stamped the eyeglasses on the larger bear. 

I die cut a white cardstock using the frame from the LF #Awesome coordinating die set. I die cut two sets. I inked the inside piece with Tim Holtz Distress Oxide inks to create a sky and grass background. I blended the green ink on the extra inside piece. I heat set the piece with the sky and grass background. I heat embossed some clouds on the sky using clear embossing powder. The cloud stamp is from LF Spooky Village stamp set. I colored the cloud with a white Wink of Stella, followed with a coating of clear Wink of Stella for some shimmer.

For the green inked inside piece, I die cut this to create a grass ground for the bears. The die is from the LF Platform Pop-up die set.

I added some snow to the mountain peaks by coloring the snow peaks with an embossing pen, then pouring in Wow! White Puff embossing powder. then heat setting it. I overlapped the mountains to create a mountain border.

I colored the tree trunks with a brown Copic marker. I positioned the bears then started tucking in the trees behind the bears, making sure to cover the bottom of the mountain, just so that it creates the illusion that the mountains are farther, and that the trees are closer. I also made sure that the tree trunks are hidden behind the grass die cut. I trimmed off any excess hanging off the side of this panel.

I adhered the grass die cut with a thick foam adhesive. I adhered the bears using a thinner foam adhesive. I added Glossy Accents to the glasses. I set this to dry.

For the outside piece of the frame, I inked one of the frames with Tim Holtz Antique Linen Distress Oxide ink. I adhered the extra frame to the back of this. I pieced in the scene to the frame. I secured both pieces with tape. 

For the sentiment, I inked a white cardstock with TH Antique Linen Distress Oxide ink. I heat set this to speed dry it. I partially die cut a banner to this blended piece using a die from the LF Fancy Folded Banner die set. I just needed a banner long enough to fit the sentiment. The sentiment is from the LF #Awesome stamp set. After I die cut the banner, I pieced this back into the negative space, and temporarily taped it on the back. This serves as a stabilizer for the banner when I stamp the sentiment. After prepping the site with anti-static powder, I stamped the sentiment to the banner using Versafine Onyx Black ink. I embossed this with clear embossing powder. I die cut an extra piece of the banner which I adhered to the back of the sentiment banner for a little bit of dimension.

For the card panel, I die cut a weave patterned paper using a 4" X 5 1/4" stitched rectangle die. I adhered the scene panel and the sentiment banner to this. I matted this with a light gray cardstock.

Thank you for visiting my blog. Have a blessed, brilliant and creative day! And, Happy Father's Day to all dads out there. 

Maria Giselle B.

I am sharing this creation at


Wednesday, June 15, 2022

Sketch Inspired Greeting Card


Hello! Welcome back to my blog. We are halfway through the month of June meaning you only have at least 14 days before the latest Incy Wincy Challenge ends. I hope you will find time to join the challenge. We have three themes for this month's challenge, Floral-Color Palette-Sketch. Below are the colors and the sketch for this challenge.


For today's card, I am featuring one of the two sponsors for this month's challenge, Mirtillamente. To see the first card I created for this month's challenge using the other sponsor, Alex Syberia Design, please visit the blog post, Two For One: Die Cut and Emboss with a Metal Die.

I printed the image on watercolor paper. I color the images using Karin markers. I followed the colors from the challenge color palette, although the blue might look lighter than the original color palette due to the Lawn Fawn Liquid Stardust I applied over the watercolor. With Karin markers, I usually apply the pigment to a palette then pick it up with a brush. I feel I have more control doing this compared to applying the color from the marker to the paper. I only do this if I need a bolder color on a part of the image just like what I did on the stigmas of the yellow lily.

For the panel, I am using a left over patterned paper panel I die cut with a stitched rectangle die. The patterned paper is from Doodlebug Design Hello 6x6 patterned paper. I trimmed three strips of patterned papers from the same patterned paper pack. I trimmed these strips into triangular strips using a paper trimmer. I mixed the triangular strips and used a tape to keep the triangular strips together, creating a wider triangular element. I adhered these to the panel, following the challenge sketch.

I wrapped a sheer ribbon around the panel. I also wrapped a white embroidery floss around the panel.

Back on the watercolored panel, I die cut this using one of the dies in the Waffle Flower Crafts A7 Layers dies. I rounded the edges using a We R Memory Keepers Corner Chomper. I lightly inked the edges with a Tim Holtz Distress Ink in Victorian Velvet. 

The digital image came with a sentiment. I added more words to expand the sentiment using a Martha Stewart Letter Rubber Stamp. I adhered this to the center of the panel.


I added shimmer to the moon and to the dots using the Lawn Fawn Liquid Stardust.

Thank you for viewing my blog. I hope you have a blessed, brilliant and creative day!

Maria Giselle B.


I am sharing this creation at


Saturday, June 11, 2022

Washi Tape Letter Die Cuts (Craft My Stash #23)


Hello! Welcome back to my blog, and to another post on my Craft My Stash series. This series intends to feature craft products that have been in my stash needing some tender loving touch. For today's post, I am featuring the washi tape. Who doesn't have some washi tape in their stash? I think I got too crazy with my washi tapes. Can't get enough, right? I still buy washi tapes but I am more selective this time. 

At the same time, I created this card for Trinity Stamps. They are celebrating their 4th year. Trinity Stamps is the first company who took me under their wing by being one of their Ambassadors last year. I am truly thankful for the opportunity they gave me. It is just right to join in their celebration and wish them more crafty years to come.

The colors of the card is inspired by the latest Color Hues Challenge as linked below. 

I adhered the polka dotted washi tape on white cardstock, lining up the circles to achieve a continuous pattern. I overlapped the washi tape just to achieve this look. I burnished the washi tape to the cardstock using a bone folder to remove any bubbles and smoothen out the washi tape. I repeated this process using a chevron black and white washi tape. 

I die cut the washi tape panels using the Trinity Stamps Marshmallow Alphabet die set to spell out the Happy Birthday greeting. I adhered the chevron patterned letters to the back of the polka dotted letters, slightly offsetting it to create a shadow. I set this aside.

For the card panel, I trimmed a black cardstock to 4 1/4" x 5 1/2". I taped this panel to the back of the Newton Nook Designs Confetti Stencil. I blended a yellow pigment ink to the stencil. After I covered the whole panel, I removed the stencil. I pounced some Ranger Perfect Pearl Lemon Sparkle to the inked impressions while the pigment ink is still wet. I wiped off the excess powder with a rag. I spritz water to the air and fan the panel to it, just to help set the powder. 

For the pennants, would you believe that this is also a washi tape? I adhered this to a black cardstock strip. I colored the pennants with a yellow alcohol marker. Word of caution, test your marker on the washi tape first. The black color on my washi tape transferred to the alcohol marker tip. Although the black tint disappeared with repeated flicking of the marker tip on paper, it discolored the marker nib permanently. I ruined one of my Copic nibs that's why I switched to the marker chisel end in coloring the rest of the pennants.

I fussy cut the pennants, leaving a small border around it. I adhered this to the black cardstock panel. I adhered the letters next. I adhered this to a top folding A2 note card.


Thank you for visiting my blog. Have a blessed, brilliant and creative day!

I added below the link to the Trinity Stamp product I used on this card. There will be no additional cost to you should you decide to purchase this product. While you are at the Trinity Stamps website, do check out the other amazing Trinity Stamps products including their newly released products. 

Maria Giselle B.

I am sharing this creation at


Wednesday, June 8, 2022

Tips on Using a Layering Rose Stamp


Hello! Welcome back to my blog. I am very vocal in saying I struggle with stamp layering. My last venture with layering stamps was March, when I used watercolor markers to add pigment to the stamp layers (Watercolor Pine Tree Christmas Tag). Unfortunately, this technique does not work with the flower stamps (Altenew Vintage Rose) I used on this card.

One of the reasons why I wanted to participate in the AECP (Altenew Educator Certification Program) is to learn how to stamp layer. Two of the classes in the program are on stamp layering. It looks easy to do for some crafters but for me, it is very challenging. You have no clue my frustrations with the thought of not being able to complete the program because I failed the layering part of the course. But with my never dying persistence, I was able to make it.

If you struggle with stamp layering, here are my own tips that will hopefully help and make it work for you. You might already know and even practice some of these tips.
  • Watch videos before starting your project. Learn from other crafters. Even if I have used this stamp before, I forget the points where to line up the layers. Write notes. I stamped the solid layer on a scrap paper, and drew arrows on where I should line up the succeeding layers based on the tutorials I watched.
  • Altenew comes with ink combos that makes stamp layering easy but if you are like me, who does not want to add more inks to his/her current ink stash, build your own combos using your ink swatch as a guide. Practice the layers. Don't forget to write the colors down for future reference. Better yet, save a layered stamped image with the color combo written down next to it. Keep this inside the sleeve of the stamp set. 
  • Sometimes it is necessary to use second generation stamping or double stamping a layer to achieve the layered look if you don't have a lot of inks.
  • The type of paper you use for stamping matters. Some paper absorb the ink really well while some does not. Some paper takes time to absorb dye inks. It is best to heat set in between layers when using this kind of paper to achieve the layered look. For me, Neenah Solar white and Hammermill have good ink absorption properties. 
  • Have one stamp block for each layer. It makes the stamping easy. I prefer circular stamp blocks for stamp layering because I tend to rotate my stamp block just to get the right alignment. Although square blocks are fine, if you have finger issues like me, the circular block is more friendly to my fingers. 
  • Have a scrubber pad handy to clean your stamp especially if you are changing colors. This will prevent color contamination when stamping in between colors. A stamp shammy should also work.
  • Unfortunately, with stamp layering, you have to be on your feet while crafting. You have to check the layering stamp points and the edges to make sure it will be aligned. Your head literally goes over the stamped image. If something is askew on that view, trust yourself that the layer will not be stamped right.
  • Stamp multiples. Stamp layering is a lot of work, so might as well have extras. You might reject some of the stamped images. You might make mistakes along the way. The stamped images does not end up alike regardless if you used the same dye inks. The extras always come in handy. Keep the extras in a baggy & place it inside the stamp set sleeve.
  • Sometimes, you might have to reverse the order of stamping, wherein the solid stamp is not the firs one stamped. There is really no set rules in stamp layering. Do it according to how you end up with better results. I reversed layer 1 with layer 2 when I was working on the gray flower. I had a hard time aligning the second layer with the very faint first layer since I used second generation stamping on the first layer. Stamping layer two with the more vibrant ink allowed me to align the first layer using the stamp points. 

I won't go into details on how I created this card since I really want the focus to be on the technique of layered stamping.


Having the coordinating die is also a plus. It does not only cut the time off fussy cutting the image. After all, you have spent a lot of time doing the stamp layering part. The coordinating dies can also be used to build dimension for the die cuts. Not to forget, it is a good way to use scraps, too. The red and gray roses are raised with an extra piece of die cut. The pink rose, on the other hand, has two additional die cuts adhered to its back. I added a third, cutting it in half to raise the top part of the pink rose only since the pink rose overlaps the red rose. 

Don't forget to zhuzh some of the leaves for more added dimension. 

The sentiments are from Altenew Label Love and Super Script stamp sets.

Thank you for visiting my blog. Have a blessed, brilliant and creative day!

Maria Giselle B.


Friday, June 3, 2022

Glittered Outline Inlaid Sentiment Die Cut

Hello! Welcome back to my blog. For this card, I was trying to make use of the negative cut left over by the  Lawn Fawn Giant Happy Birthday die which I used on a previous card. It did not quite turn out the way I wanted so I ended up die cutting a new sentiment. I did put to use some of my paper scraps of the LF Perfectly Plaid patterned paper, using it for the sentiment die cut. I trimmed a scrap paper large enough so the sentiment fits. I adhered the scraps of patterned paper to this, then die cut the sentiment using it. 

For the negative die cut, since I already adhered this to a patterned paper, I added details with the use of the LF Stitched Borders die. I taped the border dies together so I can create four patterns right away with just one passing through the die cut machine. 

I pieced in the sentiment die cut to the negative die cut piece. I prepped this for embossing using a powder tool. I added shimmer to the sentiment with Spectrum Noir Clear Shimmer pen. I outlined the letters of the sentiment with an embossing pen. I poured Wow! Midas Touch Embossing powder to this, then heat set it. This created a well for me to paint embossing fluid to the letters using the Wow! Mixed Media Embossing Brush. I poured Wow! Clear Gloss Ultra High to the embossing fluid then heat set it. 

I die cut a pink crepe paper with Ellen Hutson Never Ending Fringe die. I adhered this to the bottom back of the sentiment panel. 

I trimmed one of the plaid papers to 4 1/4" x 5 1/2". I adhered the sentiment panel to this with foam tape. 

I stamped a flower from the LF Chirpy Chirp Chirp stamp set on white cardstock using colors from the patterned paper. I die cut the flowers using the matching die. I adhered this behind a Crystal flower sequin. I adhered these flowers to the bottom edge of the sentiment panel to create a border between the panel and the fringes. I also adhered these flowers to the back of the sentiment panel on the top border.


Thank you for visiting my blog. Have a blessed, brilliant and creative day. 

Maria Giselle B.

I am sharing this creation at


Wednesday, June 1, 2022

Two For One: Die Cut and Emboss with a Metal Die


Hello! Welcome back to my blog. I created this card for the latest challenge at Incy Wincy Designs. I am the author of this challenge. For this challenge, I decided to step it up a notch by adding another challenge theme to our usual two theme challenges. The challenge elements are floral, color and sketch. Choose one, mix and match or choose all three themes for a bit of fun. I can't wait to see your take on these themes.


I am using an image from one of our challenge sponsors. I printed this on Arches watercolor paper. I tried foiling it but I only have the cold press watercolor paper which is not very smooth to catch the foil. Got to get me some of those hot press watercolor paper. 

I colored the image with Altenew Woodless watercolor pencils. I colored the image with two of the colors from the color inspiration. I added some yellow Wink of Stella to the flowers which I muted down with the clear Wink of Stella for some shimmer. I wasn't able to capture it in photo but the effect is cool in real life. I die cut this into a circle using a circle stitched die from Simon Says Stamp. 

To add the sentiment, I fussy cut the same image which I printed on printer paper. I temporarily adhered this to cover the image, making sure both are matched up. Using the Misti Stamping Tool, I stamped the sentiment using a blue dye ink. The sentiment stamp is from Simon Says Stamp called Sentimental Circles.

For the sketch elements, I am using a die from Simon Says Stamp called Air Vent. I die cut several cardstocks using this die. I am using the last three colors from the color inspiration. I created three rows of the Air Vent on the center strip. To create some variation to this, I die cut the back side for the center row. 

For the upper and lower strips, instead of die cutting, I embossed the same metal die to the purple and pink cardstock. I trimmed it to make it a bit skinny. I colored the diagonal stripes with Copic Markers in the same color. 

For the background panel,  I trimmed a cream cardstock to 4" x 5 1/4". I embossed this with a dotted embossing folder. I adhered the strips. I adhered the circle with foam adhesive. 

For the sub-sentiment, I heat embossed this on the same blue cardstock I used on the middle panel. The stamp is from Concord & 9th called Sew Pretty stamp set . I used a white embossing powder. I fussy cut this leaving a small border around it. I adhered this to the card panel, adding foam tape to the part of the sentiment where it overhangs the circle. 

I added some color coordinated sequins to the panel. 


Thank you for visiting my blog. I hope you have a blessed, brilliant, creative day!

Maria Giselle B.