Monday, August 30, 2021

Stenciled Rainbow Christmas Tree Slimline Card

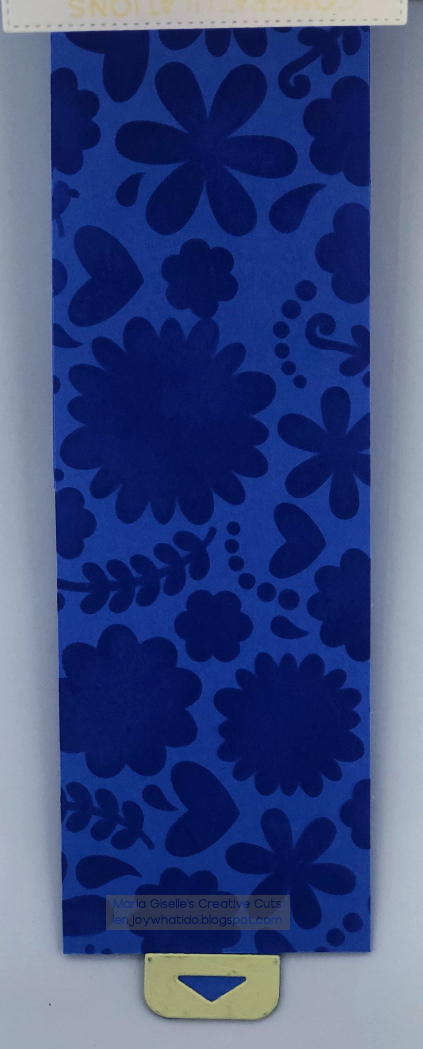
Hello! Welcome back to my blog. I had so much fun using the pearlescent chalk in my last post that I decided to use this product again on this card. I am using the Trinity Stamps Tree Of Lights stencil set to create the row of rainbow trees on a slimline panel. This is a 2-piece layering stencil set with etched markings to let you know which layer goes first. 

I cut a Neenah Solar White Cardstock at 8 1/2" x 3 1/2". I positioned the first stencil such that the point of the tree top is on the center of the horizontal panel. I used dye inks on the first and third stencil layers, starting off with the lighter shade of the color, then a darker shade for the next layer. I used the I-Crafter I-Brush Applicator Brushes in applying the ink. 


For the second and fourth layers, I added Versamark ink using a sponge dauber dedicated to this ink only. I pounced the pearlescent chalk on the Versamark ink and wiped off the excess using a dry cloth.

I finished one tree after the other until I covered the whole panel with trees. 

I am using a Gina K Whisper heavy weight cardstock for the card base. I cut this at 8 1/2" x 7", then score it at 3 1/2" on the short edge. I trimmed off an eight of an inch from the top and bottom of the inked panel. I adhered this to the card base.

For the sentiment, I die cut the Simon Says Stamp Believe wafer die on a white cardstock, an embossed shimmer gray cardstock and a silver glittered cardstock. I adhered the white sentiment die cut on top of the glittered sentiment die cut slightly offsetting the glittered die cut for a shadow effect. I adhered the grey die cut on top of the white cardstock.

For the sentiment strip, since this sentiment stamp is a two lined sentiment stamp, I masked a part of the sentiment to create it into a one line sentiment. I embossed this using white embossing powder on a black cardstock strip. The stamp is from Simon Says Stamp Believe stamp set. I adhered this to the front of the card.

I added Trinity Stamps Iridescent White Snowflake Confetti Mix which unfortunately, is not available in the TS website anymore. I am sure you can substitute this with other snowflake mix, sequins, gems or even Nuvo Drops.

Thank you for visiting my blog. Have a blessed, brilliant and creative day!

I added below the link to the Trinity Stamp stencil I used on this card. I also added links to several products you can substitute the snowflake mix with since the product I used is not available anymore. There will be no additional cost to you should you decide to purchase any of these products. While you are at the Trinity Stamps website, go ahead and check out the other amazing Trinity Stamps products especially the new release.

Thank you for your support.

Maria Giselle B.

I am sharing this creation at


Wednesday, August 25, 2021

Color Inspired Greeting Card


Hello! I am joining the latest Newton's Nook's Blog Challenge which is a color challenge as you will see at the end of this post.

I stamped Newton on watercolor paper. The image is from Newton's Nook Design Newton's Summer Treats stamp set. I used the Misti Stamping Tool in stamping the image since I am using a textured paper. It took me two more times of stamping before I got a crisp impression of the image. I used Versafine Onyx Black ink. I heat set this to speed dry the ink before coloring.

I am using Zig Clean Color markers for coloring. I am aiming for a pale/pastel look so I applied the color on a palette, then picked it up with a water brush. I fussy cut the image leaving a small white border around it.

The cat is colored with my sister's cat, Carlito, as inspiration.

For the background, I am re-introducing a product that is hardly being used nowadays, the chalk. My chalk set is stored close to my Zig which sparked my interest in using this product for this card. I temporarily adhered the NND Sunscape Stencil on a 5 1/2" x 4 1/4" Neenah Solar White cardstock with the use of Therm O Web Pixie Spray. I pounced the Versamark ink pad to the stenciled panel. Using the clip and the cotton included in the Pebbles Inc. Pearlescent Chalking set, I applied the colors on the sticky ink. Once I am done, I removed the stencil and soaked it in warm, soapy water. I wiped off the excess chalk from the panel with a dry rag. 


I added embossing to the rays by re-positioning the stencil to the inked panel. I secured this temporarily with tape to prevent shifting. I ran this through the die cut machine using an embossing mat. 

I embossed the sentiment on the panel. The sentiment is from the NND Birthday Roundabout stamp set. I used Versafine Onyx Black ink to stamp the sentiment and embossed it with clear embossing powder.

I trimmed a sliver, about an 18th", off the edges. I matted this panel with a Simon Says Stamp Lemon Chiffon cardstock cut at 5 1/2" x 4 1/4". I adhered Newton with foam tape. I added Doodlebug sequins. I added Ranger Glossy Accents to the ice cream accents. 

Thank you for visiting my blog. Have a blessed, brilliant and creative day!

Maria Giselle B.

I am sharing this creation at


Friday, August 20, 2021

Sending Hugs Greeting Card


Hello! Welcome back. I created this card to showcase several Trinity Stamps products. This is not the first time I have used theses products but I enjoy using it over and over again. It allows me to think of other ways of creating using the same products.

I created a polaroid-like frame using the dies from the Trinity Stamps Frame And Fold Die Set. I die cut this on a light brown patterned paper. Using the smallest square die, I die cut another piece of patterned paper. I created a starry background using a stamp from the TS Magical Wizards 4x6 Stamp Set. I heat embossed the stars using Wow! Silver Pearl embossing powder. I blended ink to this panel using Tim Holtz Distress Oxide in Prize Ribbon. I wiped off the excess ink from the embossed stars. I colored the inside of the stars using Sakura Gelly Roll Stardust Silver pen. 

I stamped the boy image from the same stamp set on a white cardstock. I colored this image using Prismacolor colored pencils. I die cut the image using the coordinating die


For the sentiment, I die cut this on white cardstock and patterned paper using TS Sending Hugs Die Set. The white paper was too stark so I blended ink to it using Tim Holtz Distress Oxide in Antique Linen. I added additional die cut layers to the sentiment and to each letter for some dimension. I also die cut another white layer for the letters and die cut this in half using a scalloped stitched border die. I created a strip of patterned paper by partially die cutting the stitched strip included in the die set so I can extend this strip to cover the entire width of the card.

My card base panel is a dark brown cardstock. I embossed this using a dotted embossing folder. I adhered the polaroid frame die cut, the blue starry background panel and the boy die cut to this. I adhered the strip next. I adhered the letters after, then adhered the word to complete the sentiment. 

Thank you for visiting my blog.

I added the links below to the Trinity Stamp products I used on this card. There is no additional cost to you should you decide to purchase these products. You can also check out the other amazing products Trinity Stamps have. 

Thank you for your support. Have a blessed, brilliant and creative day!

Maria Giselle B.

I am sharing this creation at


Monday, August 16, 2021

Digital Image to Cut File, Shaped Easel Slimline Card


Hello! We have a new challenge at Incy Wincy Designs. The theme for this challenge is Use A Card Fold Tutorial +/Or Animals. I am incorporating both themes to my card. We have Beccy's Place as sponsor for this challenge. 

I am using a freebie image from Beccy's Place. She has a list of freebies in her blog. I encourage you to check it out. She also has a list of card fold tutorials in her blog. I created an easel card which I modified. My design modification is inspired by Jennifer McGuire's Easel Card tutorial. 

I uploaded the design to Cricut Design Space where I modified this digital image into a one solid piece cut file. Given more time, I could have created the layers. The best thing about using the CDS is the offset feature. This is the first time I used this feature on an image. I have used this feature on fonts before and I love it. This feature adds a shadow to the image. I created the white card base of this card using the offset feature. The weld feature will be difficult to use for this design since the top of the birdhouse is pointed and irregular. There is not enough area to weld.

I also created a solid birdhouse piece by using the contour feature of CDS. This omits cut details that you don't want cut. I cut this image on a gray cardstock as the backing of the rest of the birdhouse layers.

I cut three pieces of the offset image on heavy weight white cardstock. I cut the birdhouse image on gray and lavender cardstocks. From hereon, I used my scissors to snip off any part of the cut that I don't want.


I added details to the birdhouse.  I stamped Lawn Fawn Woodgrain Backdrops to the lavender pieces using gray dye ink. The lines were also stamped. I used the arrow stamp from the set making sure I wipe off the ink from the ends before stamping it to the lavender cuts. 

The details on the birdhouse was created using Ellen Hutson Stitching Lines. The sentiment is from the same Lawn Fawn stamp set. I stamped this on the birdhouse base layer using Versafine Onyx Black ink and heat embossed this with clear embossing powder. I created the lavender circle frame using two circle dies from My Favorite Things Circle Stax die. 

The birds are from the Lawn Fawn Love Letters stamp set. I stamped this on blue cardstock and fussy cut the images up to the edge. Sadly, I had to cut off its legs. I ran a black marker around the image for a finished look. After I adhered the birds to the panel, I drew in the legs with a black pen.

I used a 3D bow die from Paper Smooches Easter Egg die set for the bow. I trimmed off the bow from the cut image which means I also have to trim off that part of the white base card. Given enough time, I could have done a better job editing this image in CDS but at that time, I was not sure of where this design will go. I prefer to just cut off some parts of the design's cuts rather than starting all over again. Hopefully, with sharing how I created this card, I can save you some time and resource/s.


Jennifer McGuire's easel card did not require a stopper to keep the easel up which unfortunately, does not work for this card. This is when I used the third white cardstock panel which was cut halfway from the base then adhered to the base to act as a stopper. The easel sometimes does not stay up but after several tries, it finally stayed up. 

Thank you for visiting my blog. I hope to see your creations at the challenge blog. Have a blessed, brilliant and creative day!

Maria Giselle B.

I am sharing this creation at

My Flip-A-Coin Combo: Add embossing, Easel Card, Traditional Stamp, Add Ribbons, Any Occasion Except Birthday Card


Friday, August 13, 2021

Watercolor On Embossed Image (New To My Stash #19)


Hello! Welcome back to another New To My Stash post. For today's post, I am featuring newly acquired products from Altenew, the Beautiful Bergenia 3D Embossing Folder and the Hello And Hugs Die Set. 

I started of by embossing a Strathmore Bristol paper using the embossing folder. The impression created by the embossing folder is absolutely stunning. You can actually leave it as is but I decided to add color to it. 

Photo Credit: Peter Krumhardt
from Better Homes & Gardens website

I am using the photo above as inspiration. I used the Tim Holtz Distress Pens and Inks in coloring. For the flowers: Tattered Rose and  Picked Raspberry. For the stems: Aged Mahogany. For the leaves: Mowed Lawn and Peacock Feathers. For the background: Antique Linen. 

I smooshed inks to a scrap Bristol paper using the colors I used for the flowers. I also smooshed inks to another scrap paper using the color I used for the leaves. I die cut the sentiment and the shadow using the hugs die from the Altenew Hello And Hugs Die Set. 

I adhered the sentiment over the watercolored embossed panel. I trimmed this panel to 4 1/4" x 5 1/2". I trimmed a sliver off each side so I can matte a Paper Source Peacock cardstock underneath with just a little bit of it showing on the sides.


I added Ranger Glossy Accents to the sentiment die cut. I set this aside to dry.

Thank you for visiting my blog. Have a blessed, brilliant and creative day!

Maria Giselle B.

I am sharing this creation at


Saturday, August 7, 2021

Sparkled Glass Greeting Card

Hello! I am trying out a Jennifer McGuire technique on this card. Check out the link to watch her video.

I am using the Waffleflower Pretty Butterflies die on this card. I created a fun foam stamp using this die. A very dainty die cut but thankfully, it worked out. After I die cut this on foam, I temporarily adhered the fun foam die cut on the door of the Misti Stamping Tool. I stamped the image on a Judikins Embossable Window Plastic Sheet which I pre-treated with an anti-static tool prior to stamping. I stamped the image with Versafine Onyx Black ink. I embossed this with a sparkly black embossing powder. Had a bit of stray embossing powder which I scraped off gently and wiped off with a rag. 

I colored the back of the embossed image with bold colors of Copic markers. 

I created the scalloped frame by die cutting a black patterned paper with Lawn Fawn Outside In Stitched Scalloped Rectangle Stackables, and with the use of a craft knife. I adhered this frame to the embossed plastic sheet, making sure the image is centered. I die cut a silver glittered paper using the same stitched scalloped rectangle die. I adhered this to the back of the framed panel. I adhered some Studio Katia Exotic Onyx Pearls to the body of the butterfly.

To create this into a card, I embossed a 5 1/2" x 4 1/4" orange cardstock with the Waffleflower A2 Piercing Panel die. Since the pierced area is smaller than the panel, I partially embossed a part of the cardstock panel. I re-positioned the die to the side without embossing then ran this through the Sizzix Big Shot machine. To make sure that the embossed design is continuous, I matched the embossed design on the paper to the embossed design of the metal die.

I stamped the sentiment on the orange cardstock panel using Versafine Onyx Black ink. The sentiment is from Waffleflower Stitched Rose stamp set. I heat embossed this using clear embossing powder. 

I adhered the sparkly panel to the orange cardstock panel.

Thank you for visiting my blog. Have a blessed, brilliant and creative day!


Maria Giselle B.

I am sharing this creation at


Friday, August 6, 2021

Waterfall Retirement Slimline Album (Craft My Stash #18)

Hello! Welcome back to another Craft My Stash post. For this post, I used a lot of my stash which made me proud of myself.

I was tasked to create something special for my friend and colleague who is retiring this year. This is not the first time I created something like this in which I asked my co-workers' participation, too. I will link the other project below. 

I die cut mini note cards for people to write their message on. After I collected the cards, I created this waterfall slimline retirement card. Thanks to this tutorial by Mixed Up Craft, I was able to pull this one through. Several differences though: 1. My card is slimline sized.; 2. I have more waterfall elements.; and, 3. Each side of the card has a waterfall mechanism.


For the front, I used the following products:
  • Cosmic Shimmer Glitter Kiss Antique Rose Kiss
  • Echo Park Summer Floral stencil
  • Paper Smooches
  • Avery Elle You die

For the frame, I used Trinity Stamps die. I used a satin ribbon from Ellen Hutson for the closure mechanism of this card.


I used the Li'l Inker Designs floral die for the embellishment on the top card. The matte was die cut using Lawn Fawn Stitched Square Stackables die. The note cards was die cut using Concord & 9th Love You So die. Although I created the waterfall mechanism using a scoring board, I partially die cut the end with the Lawn Fawn Flippin' Awesome die to create the tab for pulling. The background panel was embossed using the Cuttlebug Anna Griffin embossing folder. I inked this with Hero Arts Unicorn White pigment ink.


To embellish the pull out piece, I blended ink to one of the waterfall mechanism panels using the same stencil I used for the cover. I stamped a sentiment on the other panel. The stamp is from Technique Tuesday Dear Time by Ali Edwards stamp set. The floral stamp is from Li'l Inker Designs stamp set. If I will re-do this project, I will stamp and/or ink this panel before putting the waterfall mechanism together. I could not get a good stamped impression with the waterfall mechanism already assembled. I actually messed up on my re-stamping. You should have seen my face. Since the project is already done when I made this boo-boo, I added another layer of the panel to cover it up. This gave a bit of a struggle when sliding the waterfall through the guide. Something gets caught which you might notice in the video below.


I created a box to for the album to put the card in. I used the Martha Steward Scoring Board to put the box together.


Here is the close up of the lid. I used the same embossing folder I used for the inside of the card. I lightly rubbed the Tsukineko Delicata White Shimmer Metallic Pigment Ink pad over the raised areas of the embossed panel.


I created the gift bag by adhering pages from an old book. I used the We R Memory Keepers Goodie Bag Guide to create the jagged edge of the bag. I stapled a strip of cardstock for the handle. 


I created the tag using a scrap from my first attempt in creating the box. I was working on adding the same glitter paste using the same stencil to a corner of the lid. The paper I used was not thick enough to withstand both inking and the glitter paste. A part of the paper got ripped despite being careful on taking the tape off. I did not want to put it to waste so I turned it into a tag. The tag die I used is from Paper Smooches. The sentiment die is from Avery Elle. I did not show it in photo but I stamped the recipients name on the back of the tag.


Thank you for visiting my blog. I hope you have a blessed, brilliant and creative day!

Maria Giselle B.


As I have mentioned above, here is the link for the gift, Film Strip Reel, I created for my old boss to welcome her to our unit. 

I am sharing this creation at


Thursday, August 5, 2021

Yarn Wrapped Die Cue Letters Monochromatic Greeting Card


Hello! Welcome back to my blog. For today's post, as the title says, I am incorporating an idea of mine in which I wrap die cut letters with yarn. To be able to this, I die cut the letters several times and adhere each letter on top of each other to create a chipboard like embellishment. The die I am using is Trinity Stamps Sending Hugs Die Set. I wrapped the letters using a blue DMC embroidery floss. 


For the background, I die cut a light blue 4 1/4" x 5 1/2" cardstock using a cross stitch die. I stitched the edges using a light blue DMC embroidery floss for a tone on tone effect. I did not need to stitch the whole panel since I am covering the center with the sentiment panel.

On another piece of light blue cardstock, I stamped the sentiment using a navy dye ink. I masked the corner floral images so I can stamp this with a lighter color ink since I am going to stitch on this. I also stamped the sentiment with Versamark so I can embossed this with glittered navy blue embossing powder. The stamp I am using is Trinity Stamps Folded Hug 3x4 Stamp Set

I die cut this using a stitched rectangle die from the Trinity Stamps Frame And Fold Die Set. I stitched the flowers on the corners using a white DMC embroidery floss. I added white pearls.

I adhered the sentiment panel to the stitched panel using foam adhesive. I adhered the yarn wrapped letters by matching it to the stamped impression created by the stamp. 

Thank you for visiting my blog. 

I added the links above to the Trinity Stamp products I used on this card which is highlighted for your convenience. There is no additional cost to you should you decide to purchase these products. Thank you for your support. And, as always, have a blessed, brilliant and creative day.

Maria Giselle B.

I am sharing this creation at