Hello! I am at the Blank Page Muse blog with this mixed media panel. This is my last post for this month featuring stencils. The BPM stencil I used on this project is the BPM Pinecones stencil.
After I blended ink on the stencil, I applied glitter gel to the panel over the stencil. I used a flexible spatula to apply the glitter over the stencil.
I inked the edges of the panel with a blending tool. I used a sticky mat while creating this mixed media project. It was very helpful in keeping the paper panel and the stencil in place. Another tool I used on this project is a rotating platform. Luckily, the sticky mat fits the platform. With the platform's rotating feature, I did not have to remove the panel from the sticky mat or rotate the sticky mat. I just have to rotate the platform to work on the area that I want to work on the panel.
A close-up of the panel. I blended ink on the glittered pinecones to give it some body.
For details on how to create this card, please visit the BPM Blog.
This is the last giveaway post. I am giving away a set of BPM stencils that was sent as extra to me by BPM's lovely owner, Kim (Thank you, Kim!). She agreed for me to offer it as a giveaway. To be eligible for the prize, leave a comment on this post. To increase your chances of winning, please comment on my other BPM posts for the month of January. There are 3 chances to win. Commenting ends on January 31, 11:59pm CST. A random winner will be selected from all posts and will be anounced on my BPM post on February 8.
Hello! Welcome back to my blog. Today's project features one of Kat Scrappiness' new release, the Stained Glass Poinsettia window craft die. It also features several of the Kat Scrappiness Glitter Mousse. I hope you like it.
I created a home decor using the die. I put fairy lights inside the decor. The above photo is how the decor looks with room light on and below is a photo showing how the decor looks when the room light is off. The fairy lights are on on both photos.
To create the luminary, I die cut the poinsettia on a scrap piece of cardstock. The die conveniently cuts 4 1/4" x 5 1/2" panel perfectly fitting the front of an A2 note card. I also trimmed 4 pieces of acetate at 4 1/4" x 5 1/2" using left over packaging.
I secured the acetate on the back of the die cut window panel using tape to hold the die cut down and prevent any shifting. This is when the messy fun begins. Using a spatula, I scooped some of the KS Ruby Glitter mousse and applied it generously to the poinsettia portion of the window die cut.
Since I was working on a slick surface and with the dainty cuts of the window die cut, instead of spreading the mousse to the open areas of the window die cut, I pressed and pounced the glitter to distribute it to the open areas. I ended up removing the tape from the die cut so I can rotate the die cut. This allowed me to apply the glitter mousse better. You can also rotate your work surface instead of rotating the panel.
It looks like a hot mess at this point as I added more colors to the panel. I did not do any masking. The design of the die cut was very simple that I was able to apply the glitter mousse to the areas that I want to apply it to. I applied the green glitter on the leaves and the gold glitter on the background.
Since I was creating four acetate panels, instead of working on a panel before moving on to the next one, I applied one color of gel mousse at a time on all four panels before moving on to the next color of mousse. I started with ruby then proceeded with emerald. You can let the gel mousse dry in between colors but I did not. There was some color contamination but it was hardly noticeable.
Amazingly the die cut stencil held up through all three colors of glitter mousse.
Cutting the acetate the same size as the window panel made the lining up of the image easy by lining up the corner of the acetate with the corner of the die cut window.
I die cut a silver cardstock with the poinsettia window die. I die cut four pieces, one for each acetate. I adhered each window die cut on the acetate using liquid glue. I placed something heavy over it while the glue dries.
I trimmed strips of the silver cardstock at 1/2" x 4". I scored this at 1/4" on the short side. These pieces will be the tabs holding the window panels together. I folded the tabs on the score line, reinforcing the fold with a bone folder.
I applied glue to one of the folds on the tab. I adhered this to the inner side of the acetate panel making sure that the folded end is towards the outer frame of the acetate panel.
I adhered another acetate panel to the other half of the tab making sure that the orientation of poinsettias are the same for both acetate panels.
The beauty of using a liquid glue was it gave me time to wiggle the layers while aligning it.
Now, the pieces are connected. I continued this process until all four acetate panels are adhered together.
This is what the luminary looks like when viewing it from above.
The luminary stands up nicely on display.
I hope you like today's project. Thank you for visiting my blog. Have a blessed, brilliant and creative day!
Maria Giselle B.
I added below a link to the Kat Scrappiness product I used on this project. There will be no additional cost to you should you decide to purchase this product. While you are at the Kat Scrappiness website, do check out their wide array of products. They have a new release, too! Enjoy!
Hello! Welcome back to my blog. Today's card features products from Kat Scrappiness's Easter release. Aren't these quokkas cute? I have linked these products below in case you are interested.
I stamped the images on cream cardstock. I colored the images using Tim Holtz Distress crayons. I used a dry technique of watercoloring the images. Despite using a heavy cardstock, this paper is not resilient to water compared to a water color cardstock.
After the pigments have dried, I die cut the images using its coordinating die set. I set these die cuts aside.
I trimmed a green Easter patterned paper at 1 1/2" x 8". I applied a double stick adhesive on this wide strip of patterned paper on the side that I will be using as a background for the quokkas. I burnished this double adhesive tape to the patterned paper wide strip with a bone folder. I removed the release paper and poured Elizabeth Crafts Microfine Cool Glitter over the adhesive. I burnished the glitter to the adhesive by rubbing my finger all over the glittered strip. This glitter changes to a shiny finish after burnishing it. I gently rubbed off the excess glitter with a Swiffer dry sweeping cloth. I cut this strip into 1 1/2" x 2", creating four glittered rectangles.
I adhered the Quokkas to each glittered rectangle with liquid glue, applying something heavy on top of it while the glue dries. I rounded one corner using a We R Memory Keepers Corner Chomper. The corner I chose to corner punch is in relation to how the rectangle will be laid out on the panel.
Working on the sentiment, I die cut the word 'happy' on white cardstock. The sentiment die I used is the Kat Scrappiness Happy Birthday Word with Shadow die. I strategically die cut the word 'happy' only. I die cut these three times. The words 'happy birthday' are connected. I did a bit of surgery to separate the words. I adhered the sentiment on top of each other for a dimensional look.
For the other half of the sentiment, I die cut a banner die on white cardstock. I only need a short banner. I used the partial die cutting technique to create a short banner. The banner die I used created a score mark where you can fold it. The KS Stitched Fishtail Banner die does not create score marks but you can just score the ends depending on how long or short you want the folded piece to be.
Folding the banner before stamping the sentiment is very helpful in centering the sentiment. I tried stamping the sentiment without folding the banner and I seem to have a hard time centering it. Unlike when I folded it, I can see the score marks better so centering the sentiment was easier.
I pieced in the banner back to the negative cut and temporarily adhered this with a non-tacky tape. Using a Misti Stamping Tool, I positioned this panel to one of the corner of the Misti. I positioned the sentiment, centering the word 'Easter' on the banner. I prepped the banner with anti-static power. I covered the word 'happy' with tape, then inked the word 'Easter' with a pink dye ink. I removed the inked tape and replaced it with a new one just to be sure that I won't stamp the word 'happy' to the banner. I repeated this process another time with the ink pink. After I cleaned the stamp, I repeated the above process using Versamark ink. I poured clear embossing powder to the sentiment then heat set it.
I trimmed a lined pink patterned paper at 4 1/4" x 5 1/2". I added details to the patterned paper by adding pink lines to the existing white lines on the panel. I alternated the white line with the pink line. I adhered the glittered rectangles to this panel. I used a T-ruler to aid me with aligning the squares. I think an L-ruler will also be useful for this purpose.
I adhered the banner to the bottom of the 'happy' die cut. I adhered this to the center of the rectangles. I applied something heavy on top of this while the glue dries up.
Thank you for visiting my blog. Have a blessed, brilliant and creative day!
Maria Giselle B.
I added below links to the Kat Scrappiness products I used and can be used on this card. There will be no additional cost to you should you decide to purchase this/these product/s. While you are at the Kat Scrappiness website, do check out their wide array of products especially the exclusive Kat Scrappiness products, and their new release. They also have an ongoing Shaker Kits & Embellishments sale until today. So, hurry!
Hello! We have a new challenge at Incy Wincy Designs. The challenge theme is Red/White/Blue +/Or Sparkly/Glitter. We have two sponsors for this challenge. I am using an image from one of our sponsors.
I challenged myself to combine both challenge themes on my card. I printed the image on Neenah Solar White Cardstock. I colored the image using Copic markers. I die cut the floral panel using the third largest rectangle die from the Hero Arts Rectangle Nesting dies. I covered this panel with a double adhesive sheet. I ran a scraper over the panel to make sure that the adhesive is well adhered to the panel. I partly removed the backing sheet and poured Elizabeth Crafts Microfine Glitter on the exposed adhesive. I continued this process until all the adhesive is covered with glitter. Covering the glittered panel with the backing sheet, I ran the scraper again over the backing sheet, going back and forth, to make sure that the glitter sticks to the adhesive. After I removed the backing sheet, I burnished the glitter by rubbing my finger all over the panel. This type of glitter changes to a shiny finish after burnishing. I used a Swiffer cloth to remove any excess glitter.
I cut a 4 1/4" x 5 1/2" red cardstock. I drew a line around the edges using a glue pen. I poured red glittered embossing powder to this and heat set it.
I adhered the colored panel to this red cardstock panel with fun foam for some dimension.
For the sentiment, I die cut the word 'hello' on a red cardstock and two times on white cardstock. I embossed the red sentiment die cut with the same red glitter embossing powder I used for the outline. I adhered the sentiment die cuts on top of each other. I created a supplemental sentiment strip by stamping the sentiment on the same red cardstock using Versamark ink. I heat embossed this with white embossing powder. I die cut it into a strip using an Avery Elle Simple Sentiments die. The sentiment is from Hero Arts Hello Stamps And Cuts. I adhered both to the colored panel.
Thank you for visiting my blog. I hope to see your creations at the challenge blog. Have a blessed, brilliant and creative day!
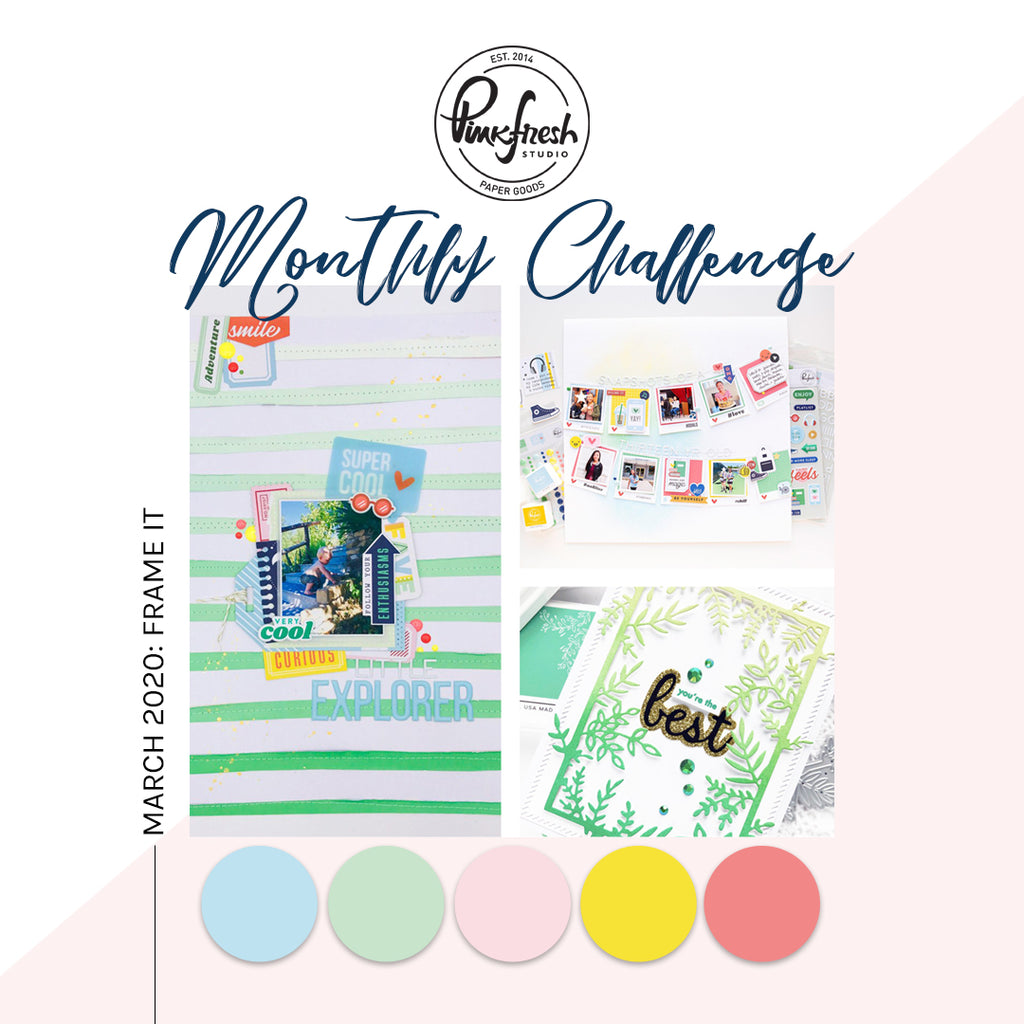
Hello! I created this card to participate in the Pinkfresh Studio March Challenge. I am using a technique I've used on a previous card I've created (Using Negative Die Cuts to Create New Cards) in which I used double sided adhesive and glitter to the recessed areas of the die cut.
I am using the one of the dies in the Pinkfresh Floral Squares die set. I am using colors from the color challenge inspiration. I had to do a bit of die cut surgery to create a colored die cut. You may just cut this die on a white color card stock and color the elements with a marker instead of die cutting the elements on different colored card stocks. For the back panel, I placed a double sided adhesive tape on a blue cardstock. Without removing the release paper on top, I positioned the floral square die on top of the release paper and ran this through the die cut machine. The die only cuts up to the adhesive layer, and it leaves a embossed impression on the card stock layer. Using a craft knife, I carefully removed the release paper on the areas where I will be applying glitter. I poured Elizabeth Craft Designs Cool Diamond Silk Microfine Glitter over this. After I poured off the excess. I burnish the glitter with my finger and wipe off the excess with a Swiffer cloth. I continued to remove the rest of the release paper, adhering the stem and the frame. With the flowers and petals, I wanted glitter on the petals so I did the same technique as I did on the blue background. I adhered the petals first before adhering the flower.
I added yellow flock to the flower center. I applied liquid glue to the center of the flower. I poured the flock to this area. I pressed the flock to the glue, then set it to dry. Do you remember this old embellishment? Do you still have a flock in your stash.
For the card panel, I am using a top folding white A2 note card. I embossed the front of the card using a Li'l Inker Design Quilted Stitched Pattern Die. I spritz Prima Cotton Candy Color Blooms to this embossed area.
For the sentiment, I embossed a sentiment from the Pinkfresh Studio My Favorite Things To Say stamp set. I used the same colored card stock I used for the frame.
I adhered the flower frame and the sentiment to the center of the note card.
Thank you for viewing my blog. Have a blessed, brilliant and creative day!
It is such an honor to be invited to participate in the Coffee and Cards Collaboration with Celeste of Crafting Junky and Deb of Meticulosity. Below is the photo inspiration for this month's collaboration.
The sentiment on this photo is very timely. It is supposed to be spring but sometimes the temperature still dips down so we can't really put the winter jackets away for the season.
On to the card, I am using a black cardstock panel, measuring 51/2" x 4 1/4", I positioned the hello die cut from the Concord and 9th Say Hello Die to help in placement of the stamped flowers. The stamp I am using is from Ellen Hutson Bold Blooms stamp set. I stamped thhe flowers and leaf using Tim Holtz Distress Oxide in Worn Lipstick, Wilted Violet and Peeled Paint. I created masks for the flowers to be able to stamp the leaf close to the flower, making it appear like the leaf is at the back of the flower. Distress Oxide has pigment ink properties. While the inked impression is still weit, I pounced Perfect Pearl to the stamped flowers and leaves using the same color. I spritz this panel with water to set the Perfect Pearl. I am not sure if the Oxide Inks reacted to the spritz ,lof water having Perfect Pearl on top of it. But I like the look of Oxide Ink on dark colored cardstock.
For the sentiment, I adhered a white cardstock on double adhesive sheet. I die cut the bold hello with the adhesive side on top. I peeled off the release paper and poured Elizabeth Craft Designs Cool Diamond Silk Microfine glitter on it. After shaking off the excess, I rubbed my finger on the glitter to set it and at the same time, the friction activates the silky feel of the glitter. I removed the excess glitter using a Swiffer cloth.
I adhered this to the center of the stamped panel. I trimmed off an eight of an inch from each sides so I can matte this onto another black cardstock.
Since my glitter is already out, I adhered a double sided tape to all four sides of a 5 1/2" x 4 1/4" black cardstock. I poured the same Microfine glitter over the tape. Just like what I did on the sentiment, I rubbed the glitter to set it. I adhered the stamped panel onto this using fun foam for some dimension.
I embossed a sub-sentiment on black cardstock using white embossing powder. The sentiment is from Hero Arts Stamp and Cuts Hello Coordinating set. I trimmed this into a strip and cut the edges to create a banner. I adhered this below the hello die cut.
I added Pretty Pink Posh Sparkling Confetti Mix as last detail.
O
As I've mentioned, this collaboration will not be complete without coffee. My photo features my all-time and only favorite coffee from Starbucks White Chocolate Mocha, non-fat and no-whip.
Thank you for visiting my blog. I hope you've checked on Celeste and Deb's photo inspired creations and their featured coffee or tea as well.
Hello! It is a new challenge at Incy Wincy Designs Blog. Our theme for this challenge is on Celebrations. I am using a digital set image from one of our awesome sponsors for this challenge, Diddybag. The first time I saw these unicorn images, I knew I was going to have fun playing with it. Aren't they adorable? This set only comes in color but I am fortunate that the owner of Diddybag, Nell, and my co-DT, Nikki, helped me in transforming the images into transparent ones so I can color it.
I printed the images on white Neenah cardstock and colored it with Prisma color pencils, adding accents here and there. I fuzzy cut the unicorns leaving a small white border around each image.
This is not the first time I made a box card. I created a box card before using a Cricut digital cut and stamped images. Here is the link, in case you are interested, WPlus9 Pretty Peonies Card In A Box. But this box card is slim and tall. I want it short and wide. Good thing, I watched this video by Laura Bassen on how to create your own pop-up box card. There are also cutting dies out in the market that makes the steps to creating a box card very simple.
I created three different cards so I can make use of the unicorn images. The set has 10 and unfortunately, I only used 9. But I will use the last unicorn to decorate the envelope as I send one of the box cards to a friend who just had a baby.
For all three box cards, I am using the Taylored Expression Rolling Clouds die and Paper Smooches Rainbow Wise die.
For this baby card, I used a light blue cardstock. I die cut the flaps using Mama Elephant Borderline Trios Creative Cuts. I sponged the edges with SSS Sea Glass dye ink. The sentiment is from Mama Elephant Just Hatched stamp set. It was heat embossed using Hero Arts white embossing powder. I lined the clouds with Ranger Glossy Accent, then poured Tim Holtz Distress Glitter Clear Rock Candy over this. I set this aside to dry.
For this box card, I used a light pink cardstock. I die cut the flaps using Concord & 9th Bags & Tags die. I sponged the edges with Tim Holtz Tattered Rose Distress Ink . The sentiment is from Ellen Hutson Spread the Sparkle stamp set. The bolder sentiment was heat embossed using Simon Says Stamp Rose Gold embossing powder. I applied Stickles Star Dust on the edge of the clouds.
For this box card, I used a cream cardstock. I trimmed a plaid patterned paper from Authentique slightly smaller than the flaps. I ran the Lawn Fawn Stitched Border dies on the edges. The sentiment is from the same stamp set I used in the previous box card. I added some Pretty Pink Posh Sparkling Clear Confetti Mix to the rainbow. For the clouds, it might be hard to see on the photos but I heat embossed the edges with the use of a Versamark pen and Ranger Holographic embossing powder.
It was such a joy creating these boxes. I hope you create something to show what you are celebrating right now. Thank you for visiting my blog. I hope you come again.