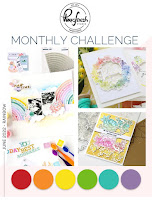
Hello! Welcome back to my blog. For today's card, I am inspired by several blog challenges that I combined the ideas in this card.
- Scrapbook & Cards Summer Issue Colour Challenge
- Pinkfresh Studio June Challenge
- My Favorite Things Sketch Challenge.
The above challenges are linked below just in case you are interested to join.
Back to card, I looked through my cardstock stash and pulled out cardstock colors close to the bold rainbow colors of the Scrapbook & Cards Colour Challenge. I trimmed these at 1/4", about 3-4 pieces per color. I trimmed a lightweight white cardstock at 4 1/4" x 5 1/2". Using the lines of my grid mat, I located the center of the short side of this white cardstock panel. I started adhering the cardstock strips from the middle, starting with yellow, then green, then blue, so on and so forth. I continued this process until I filled up the whole white cardstock panel. I set this aside to dry with something heavy placed on top of it. I trimmed off any excess hanging over the white cardstock panel.
I prepped this panel with anti-static powder tool. I stamped the Hero Arts Novel Prose Bold Prints using Wow! Clear Ultra Slow Drying Embossing ink. I poured clear embossing powder to this, and heat set it.
I die cut eight pieces of the Pinkfresh Studio Lacy Floral die on white cardstock. I adhered one die cut on top of the other for a dimensional look. I adhered this to the rainbow panel. After this has dried, I trimmed off the excess hanging over the side edges.
I die cut the frame using My Favorite Things Snow Drifts Cover Up Die-namics on white cardstock and on Graffix Platinum sheet. I snipped off the wavy lines on the center created by the die. I adhered the white frame to the back of the platinum sheet. You can easily re-created this frame using a nesting rectangle die. Depending on how skinny you want your frame, choose the two rectangles from the die set.
For the sentiment, I am using a stamp from PS My Favorite Things To Say stamp set. I prepped a vellum with anti-static powder tool. I stamped the sentiment using red dye ink. I poured red embossing powder to this, then heat set it. I trimmed this to a strip. I doubled the vellum to make the sentiment stand out since the vellum will be less opaque. I did this by trimming another vellum strip, the same size as the sentiment strip. I ran this strip through the Xyron Sticker Maker machine, then adhered it to the back of the sentiment vellum strip. I adhered this to the frame, taking note of its placement over the flowered panel. I snipped off the edges on the side.
Since the frame is somewhat flimsy, I positioned it back to the metal die. It fits back perfectly! I applied liquid glue to this, then using the metal die as a guide, I positioned the metal die over the flowered panel, then lift the metal die off leaving the frame perfectly placed on the flowered panel. I set this aside to dry with something heavy on top of it.
I added colored clear sequins from Doodlebug and Sparkling Clear Confetti Mix from Pretty Pink Posh to the open areas on the panel. I added Nuvo White Blizzard Glitter Drops over the hole of the sequins. I set this aside to dry.
Thank you for viewing my blog. Have a blessed, brilliant and creative day.
Maria Giselle B.
I am sharing this creation at


No comments:
Post a Comment