Showing posts with label Waffle Flower. Show all posts

Friday, January 23, 2026

Snowflake Stitches...It's Cold! Brrr!


Hello! Welcome back to my blog. I cannot stop myself from stitching on paper. Today's stitching patterns are from the Merry Stitchmas 24 Fun and Festive Cross Stitch Designs book by Emma Congdon. I love this book! There are so many small scale patterns that I would like to stitch on my A4 cardstock stitching panel. 

There are four snowflake patterns in the book but I stitched only three of it. The pattern is appropriately named Let It Snow! 


I also like these festive graphic alphabet in the Especially for 'U' stitching pattern. So many possibilities with it especially if you plan to personalize a gift. 

We are expecting snow tomorrow but it sure is already cold today! They have started cancelling activities for tomorrow. I am sure lucky that I am off work this weekend. 

Stay warm. Have a blessed, brilliant and creative day!

Maria Giselle B.

I shared this project at

#CrossStitcherChallenge

Friday, December 12, 2025

12 Days of Christmas Cross Stitching Template-Day 12

Hello! Welcome back to day 12 of my blog series of 12 Days of Christmas Cross Stitching. It is the last day! If you have been with me all these 12 days, thank you very much. If you just joined me, just hit old post on the bottom because there are 11 stitched patterns to see before this.

Although the original stich pattern is an advent calendar, due to lack of time, I settled with stitching the first 12 and stitch the rest for next year. 

My take aways doing this project is that I could have substituted some colors with another kind of embroidery floss (metallic, glittered or variegated) since I have some of it in my thread stash. It will also be nice if I can do a reel each time I stitch. In that way, I can share to you my awe each time an image comes to form after continued stitching. It is like Christmas morning. 


Thank you for visiting my blog. I trully appreciate your time especially these times of hustle and bustle. As early as now, let me greet you a very Merry Christmas. 

Have a blessed, brilliant and creative day!

Maria Giselle B.

Stitch pattern by Dorigo Michela for Crocette a gogo

Embroidery floss: DMC 6 strand

Paper: Neenah Desert Storm 100 lb

Piercing die: Waffle Flower 

Thursday, December 11, 2025

12 Days of Christmas Cross Stitching-Day 11


Hello! Welcome back to day 11 of my blog series of 12 Days of Christmas Cross Stitching.

For this pattern, I must have incorrectly counted the stitches. The tree ended up near the bottom of the stitching panel. I just zoomed in on the tree that's why you are not able to see it. 


I am nearing the end of this blog series. As early as now, I would like to thank you for checking in and seeing what is the stitched pattern of the day.

Please come back for Day 12. 

Have a blessed, brilliant and creative day!

Maria Giselle B.

Stitch pattern by Dorigo Michela for Crocette a gogo

Embroidery floss: DMC 6 strand

Paper: Neenah Desert Storm 100 lb

Piercing die: Waffle Flower 

Wednesday, December 10, 2025

12 Days of Christmas Cross Stitching-Day 10

Hello! Welcome back to day 10 of my blog series of 12 Days of Christmas Cross Stitching.


Thank you for visiting my blog. Please come back for Day 11.

Have a blessed, brilliant and creative day!

Maria Giselle B.

Stitch pattern by Dorigo Michela for Crocette a gogo

Embroidery floss: DMC 6 strand

Paper: Neenah Desert Storm 100 lb

Piercing die: Waffle Flower 

Tuesday, December 9, 2025

12 Days of Christmas Cross Stitching-Day 9

Hello! Welcome back to day 9 of my blog series of 12 Days of Christmas Cross Stitching.


Thank you for visiting my blog. Please come back for Day 10.

Have a blessed, brilliant and creative day!

Maria Giselle B.

Stitch pattern by Dorigo Michela for Crocette a gogo

Embroidery floss: DMC 6 strand

Paper: Neenah Desert Storm 100 lb

Piercing die: Waffle Flower 

Monday, December 8, 2025

12 Days of Christmas Cross Stitching-Day 8


Hello! Welcome back to day 8 of my blog series of 12 Days of Christmas Cross Stitching.


Thank you for visiting my blog. Please come back for Day 9 as I count down the last few days towards the 12 Days of Christmas Cross Stitching. 

Have a blessed, brilliant and creative day!

Maria Giselle B.

Stitch pattern by Dorigo Michela for Crocette a gogo

Embroidery floss: DMC 6 strand

Paper: Neenah Desert Storm 100 lb

Piercing die: Waffle Flower 

Sunday, December 7, 2025

12 Days of Christmas Cross Stitching-Day 7


Hello! Welcome back to day 7 of my blog series of 12 Days of Christmas Cross Stitching.


Thank you for visiting my blog. Please come back for Day 8.


Have a blessed, brilliant and creative day!

Maria Giselle B.

Stitch pattern by Dorigo Michela for Crocette a gogo

Embroidery floss: DMC 6 strand

Paper: Neenah Desert Storm 100 lb

Piercing die: Waffle Flower 

Saturday, December 6, 2025

12 Days of Christmas Cross Stitching-Day 6

Hello! Welcome back to day 6 of my blog series of 12 Days of Christmas Cross Stitching.


Thank you for visiting my blog. Please come back for Day 7.

Have a blessed, brilliant and creative day!

Maria Giselle B.

Stitch pattern by Dorigo Michela for Crocette a gogo

Embroidery floss: DMC 6 strand

Paper: Neenah Desert Storm 100 lb

Piercing die: Waffle Flower 

Friday, December 5, 2025

12 Days of Christmas Cross Stitching-Day 5


Hello! Welcome back to day 5 of my blog series of 12 Days of Christmas Cross Stitching. Isn't Santa adorable?


Thank you for visiting my blog. Please come back for Day 6.

Have a blessed, brilliant and creative day!

Maria Giselle B.

Stitch pattern by Dorigo Michela for Crocette a gogo

Embroidery floss: DMC 6 strand

Paper: Neenah Desert Storm 100 lb

Piercing die: Waffle Flower 

I shared this project at

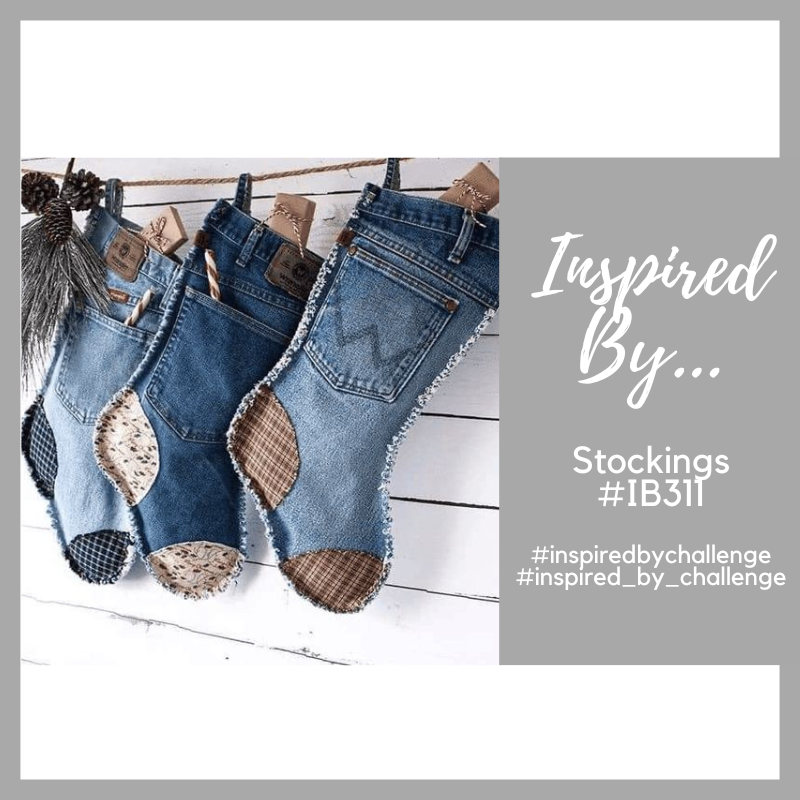
Inspired By Challenge Blog #2-Inspired by the color red, the hat, the beard, the stitching even if Santa is an elf and not a gnome.


Thursday, December 4, 2025

12 Days of Christmas Cross Stitching-Day 4


Hello! Welcome back to day 4 of my blog series of 12 Days of Christmas Cross Stitching.


Thank you for visiting my blog. Please come back for Day 5.

Have a blessed, brilliant and creative day!

Maria Giselle B.

Stitch pattern by Dorigo Michela for Crocette a gogo

Embroidery floss: DMC 6 strand

Paper: Neenah Desert Storm 100 lb

Piercing die: Waffle Flower 


Wednesday, December 3, 2025

12 Days of Christmas Cross Stitching-Day 3


Hello! Welcome back to day 3 of my blog series of 12 Days of Christmas Cross Stitching. 


Thank you for visiting my blog. Please come back for Day 4.

Have a blessed, brilliant and creative day!

Maria Giselle B.

Stitch pattern by Dorigo Michela for Crocette a gogo

Embroidery floss: DMC 6 strand

Paper: Neenah Desert Storm 100 lb

Piercing die: Waffle Flower 


I shared this project at


Tuesday, December 2, 2025

12 Days of Christmas Cross Stitching-Day 2


Hello! Welcome back to day 2 of my blog series of 12 Days of Christmas Cross Stitching. I think this will be a favorite of my sister because of the cat. 


Thanks for visiting my blog. Please come back for Day 3.

Have a blessed, brilliant and creative day!

Maria Giselle B.

Stitch pattern by Dorigo Michela for Crocette a gogo

Embroidery floss: DMC 6 strand

Paper: Neenah Desert Storm 100 lb

Piercing die: Waffle Flower 

I shared this project at


Monday, December 1, 2025

12 Days of Christmas Cross Stitching-Day 1


Hello! I am starting a new series here in my blog. If you have been following my blog, you probably know that I love to stitch on paper. In fact, I am addicted to cross stitching again. It was a total distraction to my crafting duties that I enjoy a lot.

The stitching pattern I used is designed by Dorigo Michela for Crocette a gogo which I purchased at a local store, Colour and Cotton Needleworks. The pattern is recommended to be stitched on a 13" x 23" fabric to create an advent calendar. The elements of the pattern fit a 4 1/4" x 5 1/2" cardstock panel making it perfect for this project. The stitching pattern includes 25 images for stitching. Due to lack of time, I was only able to stitch 12 of the images. 

I used Neenah Desert Storm 100 lb cardstock for my stitching panels. I cut this into 4 1/4" x 5 1/2" panel. 

I added perforations to this panel using the Waffle Flower A2 Piercing Panel die. This die creates a faux 14 count Aida cloth fabric for stitching. 

I used 2 strands of DMC embroidery floss for the cross stitching and 1 strand of embroidery floss for the straight stitch. I followed the colors on the color chart. If I don't have the color in my stash, I find a substitute color using a color converter by thread-bare.com so I can use my floss stash. 

I took a photo of the stitching pattern with my phone so I can zoom and make th pattern larger making it blurry vision friendly. I used magnifying glasses by We R Memory Keepers. 

I located the center of the pattern and the stitching panel. I marked this with a pencil. This is where I started stitching going outwards to make sure my image is at the center of the panel.

I did not stitch the number of the image and the frame which is part of the stitching pattern. 

I did my straight stitches wrong in this piece. I did my usual way of doing a running stitch in between the boxes on this project. Somehow, the pattern has the straight stich on the middle of a stitching box which meant I have to poke the paper. I was afraid that I will tear the paper at one point. I learned better on my future stitched panels which I will share here as I go through each finished stitched pieces as we count down the days to Christmas. 


Thank you for visiting my blog. I hope you come back for Day 2.

Have a blessed, brilliant and creative day!

Maria Giselle B.

I shared this project at

Monday, November 25, 2024

A Customized Christmas Card


Hello! Welcome back to my blog. Today's card was a request from a co-worker. We have an Adopt A Family Holiday collection at work. She asked me if I can make a card for the family to be signed by people from work. Why wouldn't I? This is the type of project I love the most, a card customized for the recipient.

I used my old trusty Cricut since I don't have a stocking die. I used the Cricut Design Space to plan out the layout of my card. The cut image number I used is #M402E1 or you can search stockings in CDS and choose the stockings that you want to use on your card. 

The great thing about using the Cricut is that you can resize your images depending on your project. You also have the option to use or not to use the layers of the image. The CDS also has a project template feature which guided me in resizing my images appropriately to the size of my greeting card. These are just a few of the advantages of using the Cricut.

I used an 80 lb. white cardstock for the layers. My mistake was I choose the wrong setting in cutting. I should have chosen the cardstock+ instead of cardstock only option so the cut would have gone through this cardstock. I reinforced the cut with a craft knife. I had some rough edges on some areas which I sanded to smoothen it out. 

I added Wow! MidasTouch embossing glitter on the trim of the stockings. 

I adhered the layers to the back of the stocking pieces. I assembled the stockings after. I created a loop for the stockings by cutting pieces of a jade cardstock and scoring it at the middle. After adhering the loop to the back of the stockings, I threaded a Lawn Fawn Gold Sparkle Single twine through the loops.


For the letters, I used the Sunny Studio Stamps Loopy Letters Alphabets die set. I die cut the letters three times, once on pearl white cardstock and twice on white cardstock. I adhered the letters on top of each other with the pearl die cut on top. Each letter is the first letter of the family member's name. For the dog, I heat embossed a paw on white cardstock. I adhered layers of cardstock on the back of the embossed paw print then fussy cut it. I adhered this to one of the stockings.

For the panel, I trimmed a red patterned paper to 7" x 5". I embossed the sentiment using gold embossing powder. The sentiment is from a Mama Elephant stamp set. I flicked mica gold paint over this panel and set it aside to dry.

I die cut a frame using gold mirror cardstock. The die I used is from Waffle Flower. I used the 2nd & 3rd largest frames on the WF A7 Layers die. I adhered this to the red patterned paper panel. I snuck one end of the twine under the frame. I positioned the stockings on the panel. Once I am happy with the arrangement, I added glue to the back of the stockings to adhere it to the red panel. I also squirted a small amount of glue underneath the twine. I snuck the other end of the twine underneath the frame.


I hope you like today's project. We have a month to go before Christmas is here. 

Have a blessed, brilliant and creative day!

Maria Giselle B.

There is an ongoing Project Holiday Cheer. Please go to the link for details. 

I am sharing this project at


Tuesday, September 10, 2024

Stitched Mushroom Embroidery Hoop


Hello! Welcome back to my blog. Today's project is another stitching project. The pattern is from Waffleflower.com which was created for the Waffle Flower Stitchable Hoops die. I customized the pattern to fit my stitchable die cut which was cut using The Stamp Market Embroidery Hoop dies. The difference between the two is the number of stitching holes and center. The Waffle Flower has the stitching hole as the center of the circle die cut while The Stamp Market has the stitching space as the center. So the pattern was more towards the left side of the circle. To balance this, I repeated the color on the right side of the pattern.

The nice thing about stitching on paper is that you have a lot of choices when it comes to the color of the stitching panel. I have never stitched on black fabric before but here I am, stitching on black cardstock for a change.


I substituted some of the colors on the pattern since I don't have all of the suggested embroidery floss colors. I also used an orange DMC Mouline Etoile floss for some sparkle to the pattern. How I wish I used a red one to make the mushroom really sparkly. 


This stitched mushroom embroidery hoop can be used as a gift tag, a focal image of a card or an ephemera to a scrapbook layout. 

I hope you like today's project. Thank you for visiting my blog. Have a blessed, brilliant and creative day!

Maria Giselle B.


Sunday, February 18, 2024

Another Stitched Card


Hello! Welcome back to my blog. Today's card is another stitched card. I would like to thank @shannon.christine.designs for sharing this pattern in her IG account. 

I stitched the design on a light gray cardstock. I used the Waffle Flower Piercing Panel die to add holes for stitching. I used two strands of DMC floss for stitching. I substituted some of the colors so I can use a floss from my stash. 


Somehow the white stitching does not show really well on the gray cardstock. I only noticed this after I am done with all of the stitching. I did not want to undo the white stitching because of the risk of ripping the paper. I did not want to pitch the stitched panel after all that hard work. To try and save it, I outlined the white stitching with a light pink DMC floss. It looks much better.


To create this into a card, I trimmed a patterned paper to 4 1/4" x 5 1/2". I die cut a square window at the center. I added pierced details to this panel using The Greetery Aida Cloth texture plate. 

I adhered a patterned washi tape to the stitched panel to frame it for a pop of color. I adhered the window patterned paper to the stitched panel. 

To take this project up a notch, I blanket stitched the edges. Some of the holes are very close to the edge of the paper that it ripped during stitching. You can notice this on the top border of the window panel where there are uneven blanket stitches.


I hope you like today's project. Thank you for visiting my blog. Have a blessed, brilliant and creative day!

Maria Giselle B.

I am sharing this creation at


Inspired by the XOXO.