Showing posts with label Photo Play. Show all posts

Friday, April 1, 2022

Easter Colored Inspired Greeting Card


Hello! Welcome back. Before I begin, I would like to thank Mindy of Creative Scoop for the color and technique inspiration. My colors are based on her Easter color combo. And, while I was reading her post, I came across her sparkle technique using a white gel pen which I tried on the girl's bunny hat. The effect is amazing! You should give it a try.

Anyway, we have another new challenge at Incy Wincy Designs for the month of April. We have 2 sponsors. The themes are Easter and/or Animals. I am using an image from one of our sponsors, Stampers Delights. 

I printed the image on a Hammermill 60lb sheet. I used Copic markers for coloring, adding details here and there. I fussy cut the image, leaving a small white border around it.

For the background, I am using patterned papers from Photo Play. To add detail to the checkered pattern, I stamped flowers to the white squares and adhered a small flower sequin to the center of each flower. I added lines to the dark pink squares using a white gel pen and a ruler. I traced the green lines with a pastel green gel pen. This checkered panel was cut at 4" x 5 1/4".

I die cut a green patterned paper using an egg die to create a hill to ground the image. I inked the edges with a green dye ink.

Before adhering the elements to the front panel, I heat embossed the sentiment. This sentiment is from Studio Katya. 

I adhered the hill to the checkered patterned paper. I added foam adhesives to the girl.

I added a sticker to the panel which is also from Photo Play.

I adhered this to a 4 1/4" x 5 1/2" top folding pink note card.


AN IMPORTANT NOTICE FROM MIRTILLAMENTE


Mirtillamente, our other blog challenge sponsor, has started a fundraiser to be allocated to Save The Children to help children who are victims of the war in Ukraine. Eve, the owner of Mirtillamente, has exclusively made 3 digital stamps and 1 digital paper pad for this campaign. They are on sale at this link: https://www.mirtillamentecraftshop.it/197-mirtillamente-donations.

The proceeds will be fully paid to Save The Children, the payment receipt will be published in total transparency on all Mirtillamente social channels accompanied by the names of those who contributed by purchasing the products related to this campaign.

I hope you join us in this month's challenge. Have a blessed, brilliant and creative day!

Maria Giselle B.


Image Sponsor

I am sharing this creation at

Monday, February 21, 2022

Valentine's And Easter Cards Using Photo Play

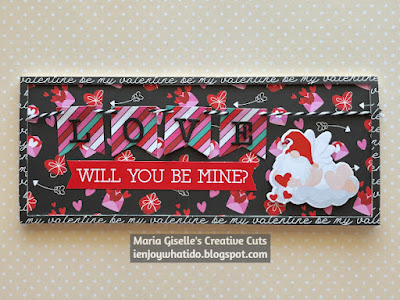
Hello! Welcome back to my blog. This will be a photo filled post since I am featuring 4 cards today. I am using Photo Play products on all the cards. For the Valentine's cards, I am using Tulla & Norbert's Love Story Collection. On the Easter cards, I am using Hop To It Collection.


The first card is a shaker card. This is very easy to replicate since all you need is one of the cut-apart patterned papers. Not only that. I used one my extra clear plastic packaging to house the shakers. Just cover the panel with the clear plastic packaging. Secure the edges with a double adhesive tape. Remember to leave one side unsealed. This will be where you pour the shaker elements you want to add to complete the shaker card. I rubbed an anti-static dryer sheet to the inner side of the plastic packaging to prevent the sequins from getting stuck to the plastic. I also adhered some hearts to the cut-apart panel. 


The second card is a slimline card. The pennant banner on this card was inspired by the pennant ephemera included in the pack. I don't have mine in my pack, so I recreated this using some patterned paper and dies. The sub-sentiment banner is also from the ephemera pack. One thing that I like about Photo Play is that they have a pre-colored print-out of the same images in the stamp set. If you are not a colorist, this is the perfect product for you! All you need is the die set which matches these images just like the stamps. 


Now, it's time for the Easter cards. I am using products from the Photo Play Hop It Collection. This is their Easter/Spring collection. For the third card, I created another slimline card. I die cut one of the patterned papers in the collection using a slimline die that cuts scalloped windows. I created scenes on each window using the stickers from the sticker sheet. Isn't the bunny adorable? 


The fourth card is an interactive card with a spinning element. The sticker sheet includes two stickers with a bunny on a basket, one facing front, and one facing backwards. It was not a perfect match when I lined it up but very close enough. If I am going to do this all over again, I will choose a smaller oval for the window. I feel that the window is too big in comparison to the bunny sticker. I added floral sequins to the spinner floss. 


Below is a video showing the bunny spinning.


Thank you for visiting my blog. Have a blessed, brilliant and creative day!

Maria Giselle B.


Thursday, April 9, 2020

Sketch Inspired Scrapbook Lay Out


Hello! I created this scrapbook lay out to participate in Scrapbook and Cards March Sketch challenge. The sketch is shown below.


I have not done a lot of scrapbooking lay outs. I find it more stressful to create this than a card. The sketch is very helpful in making me plan the materials I will use.

I looked through my paper stash which paper line I have most. I chose this Photo Play patterned paper and started choosing the elements of my lay out from this patterned paper. I chose papers with blue and cream colors since the close up photo has blue on it. I also added a colored patterned paper to supplement the colors of the fruit cake on the other photo.

The one thing fun about this project is going through my stash and discovering products that I have.


I used American Crafts Thickers for the title. I traced the white outline on the center of the letter with Uni-Ball White Signo gel pen to make the letter pop. I added dash lines with a blue glitter pen. I added metal staples with We R Memory Keepers Staple Board. I adhered faux cross stitches using Paper Smooches Cross Stitch die.


I added a wooden star Studio Calico embellishment. I adhered washi tape to the back of the wooded star for a pop of color. To do this, I folded the washi tape, with the adhesive part inside. I applied liquid glue to the back of the star and adhered the washi tape to each triangle. I brushed the front of the star with Nuvo Aqua Shimmer Midas Touch Gold pen. What is a star without shimmer?


As much as I want to add some journaling, I could not remember anything specific that I want to journal related to this occasion so I added a subtitle. To keep up with the wood themed elements on this lay out, I adhered another wooden sentiment from Recollections.  I die cut the you sentiment on wood tape and used the negative cut. I tucked this under the cute sentiment. I used the positive cut in adhering the inner pieces of the letters y and o. The you die is from Avery Elle A Tag For All Elle-ments. 


I adhered ticket die cuts to add more color. I added a folded blue cardstock over the tickets. I die cut the edge of this card stock with Mama Elephant Borderlines Trio Creative Cuts. I also used this die to cut the blue patterned paper on top of the title. I added staples and cross stitched die cuts. The cross stitch was die cut using wood paper.


I die cut a blue shimmer card stock with Ellen Hutson Star Trail die. I adhered a gold cardstock on the back of this blue shimmer card stock to make the stars pop out. I added a tab and stamped the date on it. The tab was cut using Paper Smooches Toppers die.


I added chipboard stars for more pop of color. I adhered coordinating colored sequins on the stars.

Thank you for visiting my blog. I hope I was able to inspire you to create a lay out during these stay at home days. The photos to put in a lay out need not to be recent. Recent photos make it easy to journal since the memories are still fresh. Also, it is so fun to use products from different companies to come up with a lay out. It was difficult at first but once I saw all the possibilities by seeing my stash, I really enjoyed the process of creating this. 

Have a SAFE, blessed, brilliant and creative day!

Maria Giselle B.

I am sharing this creation at


Sunday, June 18, 2017

Accordion Father's Day Card


I have several things in mind as I create this card. First, is my inspiration for this card, which of course, is my husband, the father of my 4 sons. Second, when I make a card, I sometimes look around blog challenges to see if I can come up with a card that meets its challenge rules. And last but not the least, since this is a card for someone special, I want to include my sons' participation in creating this card. Their involvement makes this card even more special and meaningful to me and I am sure, to their dad as well.

I die cut 4 mason jars using Canson Watercolor paper. The die is from My Favorite Things Die-Namics Mason Jar Mug. I know there is a rule of uneven numbers but each jar represents a son of ours. I color the jars using Tim Holtz Distress Oxide ink based on MFT blog's Color Challenge. I stamped a star from MFT First Place Sentiments stamp set on the blue mason jar. Good thing, I used the Misti Stamping tool to stamp the star on the inked mason jar. Despite using Versafine Onyx ink, which usually gives good coverage, I had to re-stamp the star several times. I heat embossed the star using clear embossing powder.


The sentiment 'Best Dad' is also from the same stamp set. After I used the anti-static tool on the star, I stamped the sentiment using Versamark ink. I used a clear acrylic block to stamp this time. I made sure my hand will not shift given the slick surface of the embossed star. I heat embossed this sentiment using white embossing powder. The effect of this technique, heat embossing on heat embossed image, is so cool. It looks like it was created using a one step process. 

I also die cut the straw and the label to create a secondary sentiment for the front panel. The sentiment is from MFT Mason Jar Labels stamp set. The sentiment is stamped with Versafine Onyx Black ink and heat embossed with clear embossing powder.

The front and back panels are 4 3/4" x 6" brown cardstock. An odd size but this is based from the size of the accordion cards, as detailed later. To add a background to this, I stamped an MFT Diagonal Sripes Cling rubber stamp. I rotated the rubber stamp to create vertical lines instead of diagonal lines. I used a Tsukineko Delicata White Shimmer Ink pad. 

I adhered the mason jars next, using foam adhesive on the blue mason jar and the label.


The accordion part is made of 4 print-out cards of a freebie from Crafts Unleashed. I only used the second part of the print-out. I think it would be fun to have the boys fill it up. They also have a chance to show their artistic talent since there is a space to draw. I printed this using a laser printer so I was able to foil the portrait border using the Minc Machine. I adhered a strip of white cardstock to the back of the cards to connect it. I adhered the card panels to the ends of the accordion.


I adhered the Photo Play Catch of the Day cardstock to the back. This is a late add-in detail to this card. The first time I saw this cardstock, I knew I would be able to use it to create a card for my husband since he loves to fish. But it wasn't available in stores as a sheet until Checkered Cottage agreed to purchase a part of the line and reserve this cardstock for me.


Thank you for visiting my blog. Have a blessed & brilliant day. Enjoy your Father's Day with your dads.

To my Amang, Happy Father's Day! I hope you feel better soon.

To my husband, Clemente, I hope you love our little surprise to you.

Maria Giselle B.

I am sharing this creation at