Thursday, October 31, 2024

Remembering You, Day of the Dead Celebration Blog Hop


Hello! Welcome back to my blog. Blank Page Muse is having a Halloween and Day of the Dead Celebration Hop featuring products from Blank Page Muse and I Brake For Stamps. I am part of this hop. Please head to the BPM blog to see all the projects created by the team for this hop. There will be links to each artist's project for details.

I am featuring the I Brake For Stamps Mrs. Bones rubber stamp. I stamped her on a light weight white cardstock using Memento Tuxedo Black ink. I colored the image using Faber Castell Polychromos color pencil. 

I used the Spellbinders Glimmer Machine to create the frame. I hot foiled a rose gold foil on white cardstock using the hot foil plate included with the purchase of the machine. I blended Tim Holtz Victorian Velvet Distress ink on the foiled panel. I added a touch of TH Black Soot DI on the inner circle of the oval frame. The foil resisted the ink. To restore the shine of the foil, I wiped off the ink from the foil with a dry rag. 

The hot foil plate did not come with a coordinating die. To create it into a frame, I fussy cut the frame, also cutting off the inner oval. 


I added texture to the stamped panel by embossing it using the Altenew Organic Linen 3D embossing folder. I added details to Mrs. Bones using glitter pens, glitter glue, enamel glue and gel pens. I blended TH Tea Dye DI to mute the stark white of the cardstock and give the panel a vintage look. 

I die cut the stamped panel with an oval die from Hero Arts making sure Mrs. Bones is at the center of the frame and there is some area to apply adhesive on to adhere the frame. 

To create this into a standing frame, I needed an oval shape a little bit smaller than the frame. I cut a heavy weight brown cardstock using the EK Success Curvy Cutter. Yes! A tool from past. Good thing my blade is still working since I read that replacement blades are hard to find. My mistake was not temporarily adhering my cardstock to the glass mat. When I felt some shifting while gliding the blade through the cutter, I stopped. Good thing the blade was able to make a mark on the cardstock. I used it as a guide to cut the cardstock with my scissors.  

I die cut the stand using The Stamp Market Scalloped Frame Die. I am still having problems making the frame stand but I think I am getting better as to where to adhere the stand on the back of the frame. 


Now, Mr. Bones and Mrs. Bones are remembered. Making this project reminded me of the lullaby song "Remember Me" from the movie Coco. I love that song! Listening to it reminds me of my Amang & Inang. I remember you, even though you are far away.

I hope you like today's project. Please join us in our blog hop. Cruise through the DT's projects and be inspired. Thank you for visiting my blog. Have a blessed, brilliant and creative day!

Maria Giselle B.

I also have three previous blog posts with the Day of the Dead theme. Below are photos of the projects and links to the posts.


I am sharing this project at


Thursday, October 24, 2024

Day of the Dead Coffin


Hello! Welcome back to my blog. Today's project was created for the Blank Page Muse and I Brake for Stamps blogs. Thank you BPM and IBFS for allowing me to share this project in my blog, too!

I created a 3D coffin for today's post. I created the coffin using the Cricut Explore machine. The cut image is from the Cricut Life's a Party cartridge. I resized the coffin based on the measurements of the stamp image. Since this is an old cut image, I made sure to attach the score lines to the cut. It just makes the folding easier with the score lines attached to the cut image. I still reinforced the score lines with a bone folder.

This cartridge includes a cut image that will cut the layers to embellish the top of the coffin. I did not use these layers on my project. Instead, I traced the coffin on a white cardstock and cut this using a paper trimmer. I trimmed a quarter inch from each side to make it smaller than the size of the coffin. I traced this white coffin piece on a black cardstock. I also trimmed a quarter off each side to make it smaller than the white coffin piece.

I stenciled floral images to the black coffin piece using a Simple Stories stencil and Tim Holtz Distress Oxide inks. I used a small blending brushed which made the ink application easy. With the small blending brushes, I didn't have to mask an area where I didn't want to blend ink into.

After the ink has dried, I adhered this black piece on top of the white piece. I poked holes so I can add an outline stitch to the design.

For the focal point, I used the I Brake for Stamps Mr. Bones rubber stamp. 


I stamped the image on white cardstock using a black Memento dye ink. Memento is a Copic friendly ink and also works well with most coloring mediums. I also like Memento since it stamps detailed images really well. 


A stamp positioner was very useful to me in stamping this image since this image is very detailed. The stamp positioner allowed me to re-stamp the image since I missed some spots in stamping. 

There is an option whether you want this rubber stamp mounted or unmounted when you purchase it. If you chose the unmounted, like me, to stamp the image, adhere the unmounted stamp to the door of the stamp positioner as seen on the photo above. I used a glue stick to do this which worked really well. The stamp held on to the door during the stamping and re-stamping. To clean the glue off from the back of the stamp and the stamp positioner door, I just used a wet rag.


I used different coloring mediums to color Mr. Bones. I used color pencils for the base layer. A sharp color pencil was very useful in coloring those tight spots. I then used an alcohol marker which worked well in coloring the hat since this is the largest part of the image. I also used gel pens for accents, coloring over some of the areas colored with color pencils. 


I fussy cut the image leaving a white border around it. I used a craft knife to cut the areas in between Mr.  Bones' arms and body.


I added dimensional glue to some areas and also colored some parts with a shimmer pen.

I adhered Mr. Bones to the coffin panel I created earlier. I adhered this to the front of the coffin using foam adhesive.


This 3D coffin can be used as a decor. I forgot to mention that this coffin can be opened to reveal a hidden message or even a candy bar measuring up to ~1/2". 

I hope you like today's project. Have a blessed, brilliant and creative day!

Maria Giselle B.

Blank Page Muse and I Brake For Stamps are generously offering a 15% discount to their online store to YOU, my blog readers. Just use the code BPMMaria when you check out. Enjoy!

I am sharing this project at

Sunday, October 20, 2024

Pop-up Spider Web Card


Hello! Welcome back to my blog. I created another card using my most used and favorite Kat Scrappiness product, the KS Creepy Crawly craft dies. 

I die cut the spider web on different white circle die cuts from my stash. I arranged this on a dark pink A2 notecard to create a background. I adhered the spider webs. I snipped off any spider web that is hanging over the edge of the card.


For the pop-up, I adhered a white cardstock onto a double sided adhesive sheet. I removed the release paper to expose the adhesive. I poured the Elizabeth Craft Designss Silk Microfine Warm Diamond Glitter on the adhesive. After I brushed off the excess, I burnish the powder to the adhesive by rubbing my finger on the powder. I die cut two pieces of the half spider web and the small spider on this glittered paper. I added dots of black enamel glue to the eyes of the spider.


I created the pop-up mechanism using strips of cardstock cut at 1/4" x 1.5". I scored the strip at 1/4" on the long side. After reinforcing the folds, I adhered the two overlapping ends of the strip to form a square. I created another piece of this. I adhered both pieces together, then adhered it to the inside of the card making sure the fold of the card is aligned with where the two squares meet. 


I adhered one of the glittered spider web on one of the squares making sure the straight edge of the spider web is aligned with the card fold. I adhered the other spider web to the opposite side of the card. After the glue has dried, I adhered the spider to the bottom part of the spider web.

Initially, the spider web won't open up despite when the card is opened. I think not all of the adhesive have glitter stuck to it. To prevent the spider web from being stuck closed, I brushed the spider web with a powder tool to neutralize the adhesive. 

The background was too bare for me. I don't have any KS Halloween themed stamp in my stash so I created my own stamp by die cutting the whole spider web die on a circle craft foam. I inked this DIY stamp with a pink dye ink and stamped it on the inside of the card.

I adhered washi tape to add sentiments to the card.


I hope you like today's card. Thank you for visiting my blog. Have a blessed, brilliant and creative day!

Maria Giselle B.

I added below a link to the Kat Scrappiness product I used on this card. There will be no additional cost to you should you decide to purchase this product. While you are at the Kat Scrappiness website, do check out their wide array of products. They have a new release, too! Enjoy!

I am sharing this project at

Saturday, October 19, 2024

Halloween Rosette Display Card


Hello! Welcome back to my blog. This is my third post featuring patterned papers from the Simple Stories Simple Vintage Scary Stories collection. You can find the other two projects on the posts before this one. 


My card is a 5"x7" card. It is a card that stands up for display. I created a display card before, Christmas Ornament Display Card. Please check it out for detailed instructions on how to create a display card.


The rosette was created using the Keep It Creepy patterned paper. I punched one edge of the patterned paper with a spider web punch. I trimmed the spider web adding an inch from the edge of the spider web. I scored the spider web strip at every inch mark being gentle in scoring the spider web. I flipped the spider web strip to score the strip at every 1/2". I gently folded the spider web strip on the scored lines. I reinforced the folds with a bone folder. I adhered the ends of the spider web strip to form a ring. 

With the spider web ring up on the table, I pressed it flat on the table to make it into a rosette. I squirted glue on the center using a glue gun. To ensure that the rosette will not get undone, I adhered a scrap paper to the center of the rosette.

The center of the rosette is from one of the cut apart tags in the collection. I fussy cut the image leaving a small border around it. I pounced this cut up on Versamark ink, poured clear embossing powder to it, then heat set it until all the powder is melted. I repeated this step to add more dimension to the cut up. I adhered this cut up to the center of the rosette.

I adhered a twine on the back of the rosette so it will float inside the display card.

The patterned papers I used for the display card are the Tricks & Treat and So Ghostly.

I hope you like today's card. Thank you for visiting my blog. Have a blessed, brilliant and creative day!

Maria Giselle B.

I am sharing this project at


Friday, October 18, 2024

Rosette Halloween Card with a Surprise Interactive Feature


Hello! Welcome back to my blog. I created a card using a patterned paper from the Simple Stories Simple Vintage Scary Stories collection. This is my second project using papers from this collection. The first project I created was a Halloween Mini Tag Book which is on the previous post in case you are interested to check it out.

I used the Tricks & Treats patterned paper on this card. The minute I saw this patterned paper, I fell in love with it. It brought me back to that era of crafting when rosettes were on trend. It reminded me of how I loved creating this embellishment.


I strategically cut the patterned paper to 4"x 5 1/4". I needed the large rosette pictured above on this panel. I inked the edges with a Tim Holtz Distress Black Soot ink.

Since the paper is pretty by itself, I just added accents with stitching on some of the rosette centers using metallic and shimmer flosses.

I fussy cut one of the larger rosettes. After stitching on it, I stuck a brad thru the center of the rosette. Before setting the prongs of the brad, I punched a hole on the center of the rosette on the card panel, the one similar to the rosette I fussy cut. I slipped the prongs of the brad through this hole, then set it. This added an interactive feature to the card since you can rotate the rosette. 

I glued gems to the centers of the stitched rosettes. I adhered this panel to a dark orange cardstock cut at 4 1/4"x5 1/2", then to an A2 note card.

I heat embossed the sentiment on the same dark orange cardstock using white embossing powder. I die cut this into a strip using an Avery Elle Sentiment Strip die. I die cut 2 more pieces of this strip, then adhered it to the back of the sentiment strip for a little bit of dimension. I adhered this to the stitched panel. I went for a non-Halloween sentiment so I can give this card any time of the year.


I hope you like today's card. Thank you for visiting my blog. Have a blessed, brilliant and creative day!

Maria Giselle B.

I am sharing this project at

Thursday, October 17, 2024

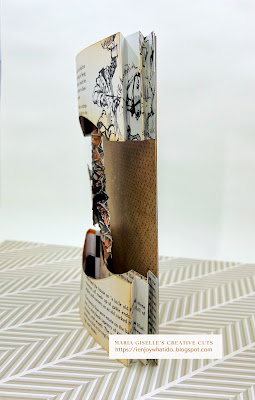
Halloween Mini Tag Book


Hello! Welcome back to my blog. I created a mini-book using some of the patterned papers from the Simple Stories Simple Vintage Scary Stories collection.

I love cut apart patterned papers! For the cover of the mini book, I used one of the 4x6 elements on the cut apart patterned paper. It worked perfectly as a cover for the mini tag book. I scored the 4x6 element at 2 1/2", 3 1/2" on the long side.


To make the cover sturdy, I trimmed the So Ghostly patterned paper at 6" x 4", the same size as the 4x6 element. I trimmed this further to 2 pieces of 2 1/2" leaving an extra inch strip. I trimmed a sliver off an edge of each piece. I adhered each piece to the back of the scored 4x6 mini book.


There are 12 tags in the tag elements patterned paper. I trimmed the tags per row. I scored the tags where two tags meet. I folded the tags, folding it back and forth to train the score so these tags can be folded accordion style. 


I trimmed one tag to cover the back of the tag that is adhered to the spine of the mini book cover.


I was generous in embellishing the tags. I used supplies I have in my stash. I tried not to use embellishments that are too dimensional to allow the book to close. If it doesn't, you can add a band to close it up. You can also punch a hole on the edges of the cover, thread a ribbon through the holes and use this to tie the book shut as another option to close the mini tag book. 


For the last row of tags, I reused one of the tags on the first row. I adhered the journaling part of the tag to the most right tag to add some variation to the journaling tags. 


One of the tags has the above sentiment with a very cute font. I can't resist adding stitching to the letters using metallic and sparkly embroidery flosses. I adhered an extra tag to the back to hide the stitching on the back of this tag. 

I hope you like today's project. Have a blessed, brilliant and creative day!

Maria Giselle B.

I am sharing this project at


Wednesday, October 16, 2024

Mica Pearl Watercolored Image


Hello! Welcome back to my blog. I am paying tribute to the Day of the Dead with this project. I used the I Brake For Stamps Sugar Zen Skull rubber stamp. 

I stamped the image on watercolor cardstock using Versafine Onyx Black ink. The details of the stamp image was captured beautifully by this ink. Not to forget that this is a watercolor friendly ink which is the medium I used on today's project.

I colored the image using Finetec and Coliro pearl watercolors. I used a water brush with a fine tip to watercolor the image which was very helpful on those tiny spaces.


Once I am done with the watercoloring, I used a metallic pen to add more details to the image. 

I die cut the panel into a circle using a circle die.

I used Kuretake Gansai Tambi watercolor to color the background black. I sponged the sides with a blank ink to hide the white core of the watercolor paper.   

For the back panel, I die cut a scallop on white cardstock. I adhered different colored crepe paper to the edges. I trimmed off the excess.

I adhered scrap circle die cuts to the back of the skull panel to add a bit of depth. You can use foam adhesive or fun foam instead. I just like to make us of my scraps if I can.

I adhered the focal point to the scalloped crepe paper panel.

This project can be used as a decor on a table. It can also be hung by adding a string on the back. Create more pieces to make it festive. It can also be adhered to a notecard as a focal point. Or, cut another scallop piece to make it into a shaped card.


I hope you like today's project. Have a blessed, brilliant and creative day!

Maria Giselle B.

Blank Page Muse and I Brake For Stamps are generously offering a 15% discount to their online store to YOU, my blog readers. Just use the code BPMMaria when you check out. Enjoy!

I am sharing this project at