Showing posts with label 3d. Show all posts

Friday, May 1, 2026

2-for-1 Graduation Cards


Hello! Welcome back to my blog. It is time for a new challenge at Stick It Down Scrapbook and Card Making Challenge on FB. It is very easy to join the challenge. There are three options to choose from. You can create a scrapbook layout, a double page scrapbook layout or a card. Choose one or choose all! 

I am commissioned by a college peer to create graduation cards that she will give away. Aside from the occasion, she specifically wants cards with gift card holder. I used this month's sketch to create two-for-one graduations cards since she ordered a dozen.


The first card I created was a shaker card. I trimmed a dotted Simple Stories patterned paper at 4 1/4" x 5 1/2". I die cut the stars on this panel using a star die from Altenew. I adhered an acetate on the back of the window patterned paper. I adhered strips of foam adhesives around the stars over the acetate. I wanted to contain the confetti in each star that's why I surrounded each star with foam tape. You don't need to do this. You can just surround all of the stars with foam tape to create one well.

The messy part of this project is putting the confetti in the shaker well. I treated the acetate and the sides of the foam with an anti-static powder tool to lessen the cling of the confetti. Somehow, the confetti has a mind of its own, adhering to places where it should not. 

I applied liquid glue to the foam before covering the well with patterned paper. The liquid glue allows some wiggle time in positioning the patterned paper over the shaker well. The down side of this is sometimes the confetti gets attracted to the liquid glue. 

I die cut star frames on a dark gray metallic paper. I used the star die I used to die cut the star windows and the next smaller sized star from the same Altenew die set. I pieced this on the acetate star window, adhering it with glue. 

I die cut the sentiment on gold glitter cardstock. The sentiment die is from Paper Smooches. I performed a bit of surgery on the die cut sentiment. Instead of using the original die cut of "congratulations", I trimmed the sentiment down to "congrats". The exclamation point is from a Hero Arts die set.


I created a gift card pocket using a We R Memory Keepers Goodie Bag tool. I adhered this to the inside of the card and embellished it with a grad cap which I cut using the Cricut. I stamped the inside and the grad cap with sentiments from my stamp stash.


I was tempted to add some gold splatters on the front but I was afraid it is going to take the eye away from the shaker so I kept the background as is. 


For the second card, I used the negative cut stars from the first card. I scored the gray star die cuts from the points to the center to make it 3D. I added a foam square to the back on the center to keep it raised as I adhere this to the dotted patterned paper star die cut. For the points, I used Ranger Glossy Accents to adhere this to the dotted star and keep the score folds up.

For the background panel, I partially embossed a white pearl cardstock with an alphabet embossing folder. I adhered the stars to this panel.


For the sentiment, I stamped this on gold pearl cardstock with black pigment ink. I poured black glitter cardstock to the wet ink and heat embossed it. I die cut the sentiment into a strip using the coordinating die. The stamp and die are from Pinkfresh Studio.

I curled the sentiment banner. I added a foam adhesive on the center and curled the ends up adding a dot of glue close to the edge to keep it adhered to the panel. 


For the inside of the card, I adhered a scrap patterned paper to the bottom to act as gift card pocket. I stamped the sentiment with a dye ink. Dye inks are supposed to dry quickly. My stamped sentiment did not. I accidentally smeared a part of the sentiment. Uggh! I was tempted to pitch the note card. I even thought of restamping the sentiment on another paper then fussy cut it. Then I remembered my white gel pen. I wrote over the mess to cover it up. Now, the boo-boo is hardly noticeable.

I hope you like today's cards and that you join this month's challenge. We always love to see your projects.

Have a blessed, brilliant and creative day!

Maria Giselle B.

I shared these cards at

Friday, March 21, 2025

Baby Boy Themed Hot Air Balloon Centerpiece

Hello! Welcome back to my blog. Early this month I created a hot air balloon centerpiece for Paper Rose Studio. A coworker of mine liked it that she commissioned me to create a baby boy themed centerpiece which she will gift to a friend on her friend's baby shower.

I find it challenging to re-create a project I made. It gives me a chance to improve the design of the project.

My first challenge was to find the right patterned paper for the project. She requested it to be colored blue. My local craft store does not carry a lot of blue patterned paper. So, I resorted to online ordering with the hope that it is the right blue, and that it will arrive on time for me to meet my deadline. I ordered the patterned papers from Scrapbook.com which shipped my order in time. The patterned papers are from Doodlebug Design which was perfect for the project theme.

I won't go into details on how I created this centerpiece. If you are interested in the creation process, here is the link to the post of my first hot air balloon project which includes process photos:

https://ienjoywhatido.blogspot.com/2025/03/paper-rose-studio-sweet-valentine-hot.html


I cut the giraffe using Cricut. I layered the cuts. I added details to the eyes and the spots using markers. 

On the weaved basket, instead of cutting the excess, I folded the excess inward and adhered it to the inside of the basket. This made the edge of the basket smoother. This is one of the improvements I made on this balloon.


I adhered baby themed sequins on the bottom of the platform where the giraffe rests for additional details. I should have adhered this sequins before inserting the platform inside the basket. It just makes the adhering of the sequins easier.

I added something heavy underneath the platform to prevent the centerpiece from falling. This is another improvement to this hot air balloon. I used heavy foams from my stash which perfectly fitted underneath the platform. I got these foams from my sister, who is not sure how to use it.


I adhered a light blue pearl on the top of the hot air balloon for additional embellishment. This is another improvement to the design. It is also a way of hiding any imperfections with adhering the honeycomb paper.


This is how the hot air balloon looks viewing it form the side. I love the design variation created by the double sided patterned paper.


I took a photo of both hot air balloon centerpieces that I created before delivering the blue piece to my coworker. 

I hope you like today's project. Thank you for visiting my blog. Have a blessed, brilliant and creative day!

Maria Giselle B.

I am sharing this project at


Sunday, March 2, 2025

Paper Rose Studio Sweet Valentine Hot Air Balloon Centerpiece


Hello! Welcome back to my blog. Today's project features products from Paper Rose Studio's Sweet Valentine collection. I love this collection! It might be a Valentine's collection but who said it cannot be used for another occasion? 

My project involves a lot of techniques which I hopefully captured in the process photos below. This project also requires a lot of time and patience. I set the project aside a couple of times to allow the glue to set in. 

1. Creating the Weaved basket


I trimmed the Basics B 12x12 patterned paper into strips using the pattern as guide for trimming. I trimmed this paper in half so my strips will be 6" long.


I flipped the pink strips so that the wrong side is up. I taped the strips together to help control the movement of the paper during weaving. I weaved the striped patterned strips through the pink paper strips.


I only weaved 5 strips. The focal element I used is small. 

I added dots of glue to the weaved strips to keep the weaved strips permanently in place. 


Once the glue has dried, I flipped the weaved strips and scored the strips where the weave ended.


I folded these strips upward. I continued to weave paper through these strips that are sticking out to create the wall of the basket. 


There will be times when a strip of patterned paper is too short to weave around the whole basket. I tucked the end behind a vertical strip. I started with a new strip from where the last strip ended. I kept adding dots of glue to keep the weaving secure. I used laundry clips and reverse tweezers on areas that I applied glue on to hold the weave while the glue dries.


I trimmed off the excess vertical strips using the horizontal strip as a guide for cutting.

2. Creating the Honeycomb Balloon


I die cut 24 pieces of circles on the Basic E patterned paper. My circle is about 5 3/4" in diameter allowing me to cut 4 circles on a patterned paper.


I created a template using the negative circle die cut by folding this panel on the center. I used this to guide me where to score the circle die cut. 


I folded the circle die cut on the score line using a bone folder for a crisp fold.


I created another template using another negative die cut panel which I used as my gluing template. I marked the center of this template on the center as pointed by the arrow above. This is where I applied a line of glue on the inside of the fold, which is the B side of the circle die cuts.

I use clips to keep the folded circle adhered. As the glued circle die cuts piled up, I placed a magnet over the center of the half circles. I wait for about 10-15 minutes before going to the next step.


On the glued half circle die cuts, I applied a line of glue to the sides of the half circle, about 3/4" from the edges as shown above as red lines. The pink marks are guides as to where the half circle should be aligned.


After applying the liquid glue, I placed another glued half circle die cut over it. I continued this process with all the circles.


I adhered the half circle die cuts in batches. I glued 6 pieces together first. I clipped it with a laundry clip before working on another batch. Once I was done adhering the half circles together, I adhered the each batch of half circles together. 


I secured the 24 circles with a large laundry clip and set this aside to dry. I was tempted to open the folded balloon but decided not to.

3. Creating the Inner Basket Platform

I created a platform using a light pink cardstock to elevate the bunnies inside the weaved basket. 


I cut the cardstock based on the measurement of the inside of the basket plus 1/2" on all sides. I scored each side at 1/2".


I snipped the scored lines as seen above to create tabs. I folded the cardstock on the score lines. 


I slipped the unglued platform inside the weaved basket to see if it fits. 


I marked the center of the platform with a pencil. 


I hammered a hole on the marked dot on the platform.


I threaded a white stick through the hole to test the stick, if it fits the hole. 


I cut a hole on the corners where I will thread the yarn. At this point, the tabs were already glued. If I planned this ahead of time, I would have cut the slits before adhering the tabs. This trick still worked though.


I pushed the yarn through the holes with the help of a craft tweezer. If you noticed the yarn is knitted. I knitted this a while back. I was practicing how to knit. I am so glad that I am able to finally put this knitted yarn into use.


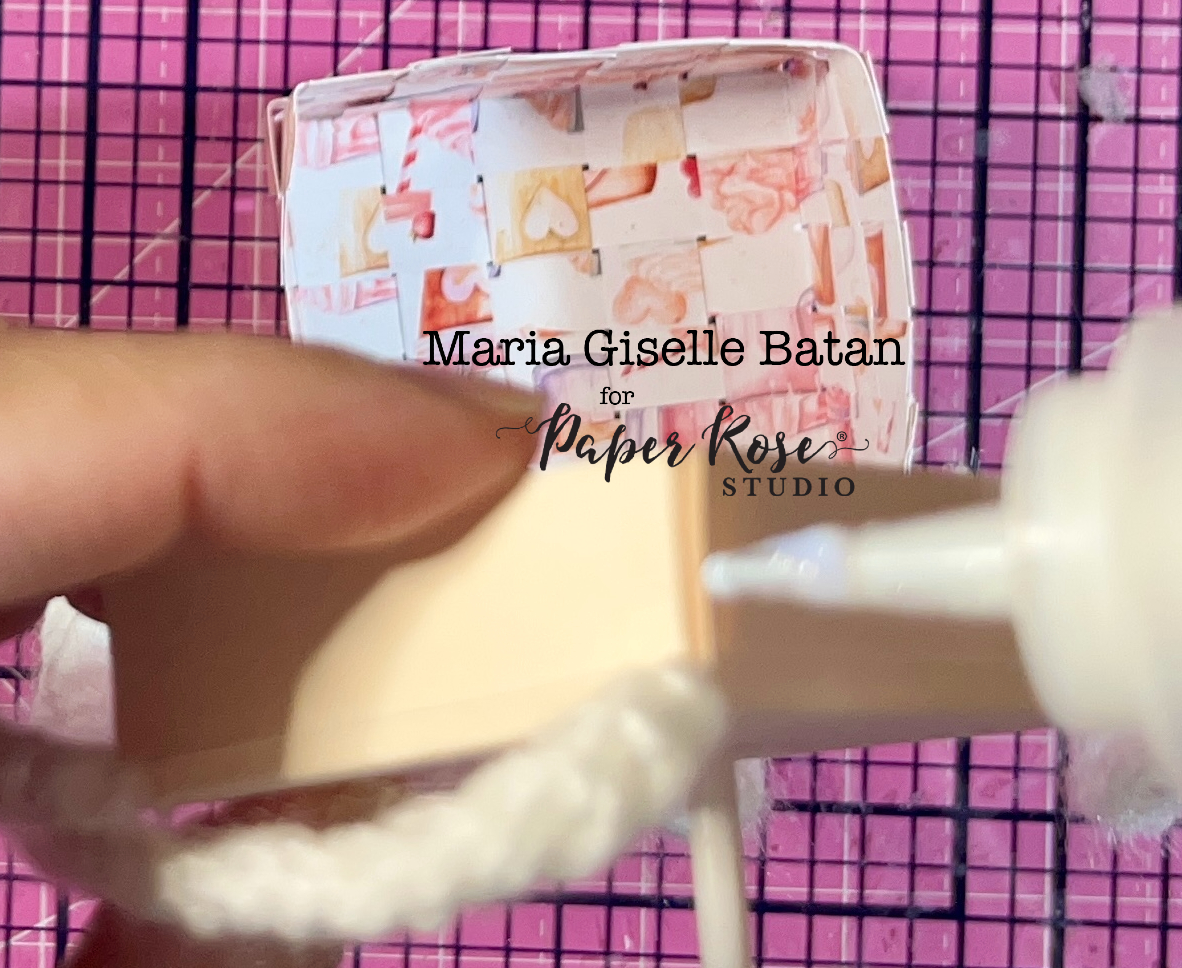
I switched to a glue gun to adhere the yarn to the bottom side of the platform.


This is how it looks with all the knitted yarn threaded through the corners of the stand.


I added a blob of glue using the glue gun on the reverse side of the stand. I stuck the stick through the hole and into the glue.


I added glue to the corners of the stand using a liquid glue. I also added a blob of glue from the glue gun on the bottom part of the weaved basket.


I inserted the stand to the weaved basket. I pushed the stick towards the weaved basket so it will be glued to the heat gun glue adhered on the bottom of the basket.

4. Connecting the Balloon to the Basket


I generously applied glue to the inside of the folded circles.


I added glue to the two outer ends of the half circle just like how I did it earlier.


I opened the folded half circles to make the ends meet and create the balloon. I applied clips to keep these ends together while the glue dries.


My stick was too thin to support the balloon. Good thing that I found another stick that is larger than the first stick. I was able to thread the thin stick through it. I applied a blob of glue using the glue gun on the bottom center hole of the honeycomb balloon. I inserted the stick into the glued hole. I squirted some glue to the base of the stick.

I applied liquid glue in between the honeycombs where I pushed the knitted yarn into. 

5. Adding the Critters


I used the negative space of the rabbits embellishment as a stencil to trace the shape of this die cut to a piece of white cardstock. The rabbits are from the Sweet Valentine Embossed Die Cuts pack.


I fussy cut this traced embellishment. I adhered this to the back of the embossed die cut to cover the stick as seen below.


If I will do this all over again, I will make the basket sturdier. Although this centerpiece does stand, it sometimes tumble forward based on how it was placed on the surface.


I adhered floral sequins to the floor of the platform for a bit of shimmer and interest.


I hope you like today's project. Thank you Paper Rose Studio for allowing me to share this project  in your blog. 

Have a blessed, brilliant and creative day!

Maria Giselle B.

I am sharing this project at