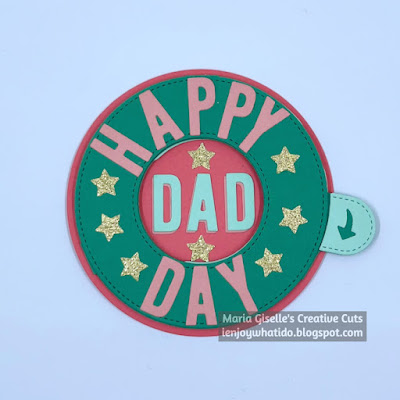
Hello! Welcome back to my card. I am excited to share my card with you today. I had the Lawn Fawn Magic Iris die set in my craft stash for a while now. I only get to use it this week. My first try didn't turn out the way I wanted it to be. I almost wanted to call it quits but I am glad I did not because I just love how this card turned out.
Lawn Fawn has a video tutorial on how use this die set which I am linking here, Magic Iris. I highly recommend that you watch the video before using this die set. I had to watch it again on my second attempt on using this die just to be sure I am doing it right.
My colors are inspired by the latest Inkspirational Challenge which I also linked below in case you are interested to see and join their challenge. I usually look around at other blog challenges to find inspiration especially when I hit a wall while creating something.
The latest Lawnfawnatics Challenge (also linked below) is Dies Only. True enough, this card used only dies. The sentiment die cuts are from LF Cole's ABCs die set. The smiley face is from the LF Outside In Stitched Flower die set. The glitter stars are from my die cut box. I apologize because I am notd sure which die I used for the stars. I usually die cut little shapes ahead of time and store it in a bea box so it is ready for use. I am sure you can find any star die in your craft stash that you can use for this purpose.


What a fun card design with the iris opening Maria! So pretty using the colors on our mood board and a great card for Dad! thank you for sharing with us at Inkspiration! Julia xx
ReplyDeleteoh my goodness! this is so cute! LOVE the interactive and shaped card!! so clever and unique!! and FUN! thank you SO much for playing along with the Lawn Fawnatics Challenge! :D
ReplyDelete