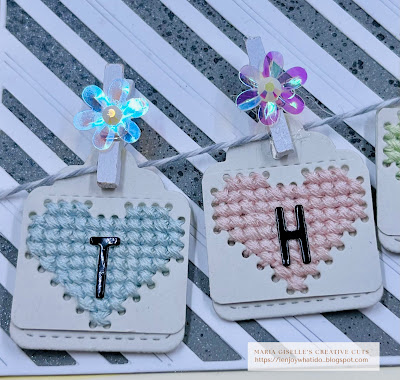
Hello! Welcome back to my blog. I created today's project inspired by the photo and sketch on this week's Inspired By Challenge. Best of all, I was able to incorporate stitching on this project which is a favorite technique of mine.
The stitching holes were created with the use of a die from the Waffle Flower Stitchable Hearts die set. I die cut the hearts on a light gray cardstock. The die creates a row of three stitchable hearts. I trimmed the hearts apart so I can adhere a heart to a tag. I stitched each heart with a different color of DMC embroidery floss, following the colors of the hanging clothes on the inspiration photo.
I die cut the tags on the same light gray cardstock. The tag die is from the Lawn Fawn Tiny Tags die set.
For the card panel, I die cut a white cardstock using the Pinkfresh Studio Slim Fancy Diagonal Stripes die. I backed this with a dark gray cardstock which I spritz with pearlized water first. After I dried this with a heat gun, I spritz the same panel with a black Mica spray. I dried this again with a heat tool. I adhered the striped die cut to this shimmery panel. I trimmed off any excess.
I cut a gray-white twine long enough to cover the width of the slimline panel. I threaded the twine through the holes of the tags. I adhered the ends of the twine to the back of the slime line panel.
I arranged the tags on the panel. I adhered the tags to the panel with a foam adhesive. I added a white mini clothespin on top of the tags. I made these clothespins secure to the tag and the panel with the use of a glue gun. I adhered a floral sequin on the top of the tag. I adhered a white gem on the center of the floral sequin.
I die cut the letters on a black mirror cardstock using the alphabet die from the SugarPea Designs Message Letter Board die set. I adhered each letter on top of each stitched heart.
I hope you like today's project. Thank you for visiting my blog. Have a blessed, brilliant and creative day!
Maria Giselle B.
I am sharing this project at


No comments:
Post a Comment