Tuesday, February 1, 2022

Color Inspired Slimline Card


Hello! Welcome back to my blog. Welcome also to our first challenge of the year at Incy Wincy Designs. We have cut back to a monthly challenge to give our friends more time to participate. We are also continuing the two themes monthly challenge. You can choose one theme or use both themes on your project.

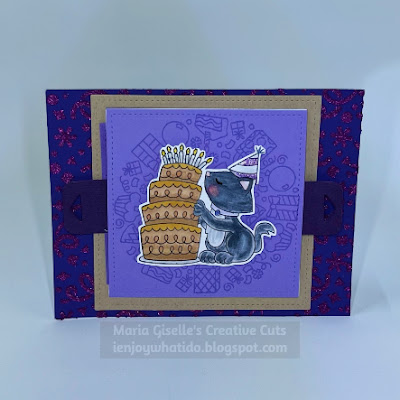
For my card, I created a mostly pink and red slimline card using an image from Alex Syberia Design, one of our two sponsors for the challenge. The other theme for the challenge is Valentines. My card can also be a Valentine's card.


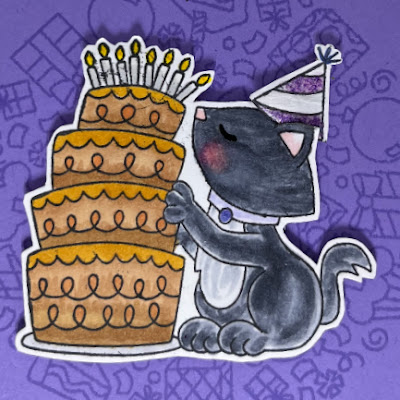
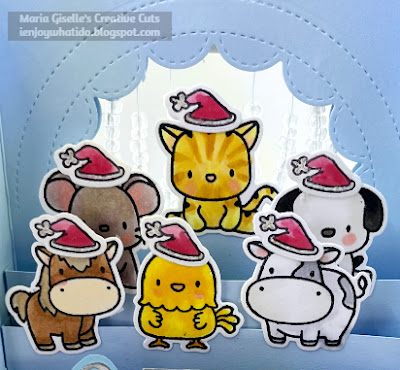
I printed the image on Arches watercolor paper. I colored the images with different brands and mediums of red and/or pink watercolor markers, crayons and pencils. I also used different pens for adding accents. I encourage you to look at your stash and color away. I fussy cut the image leaving a white border around it.

I die cut several stitched squares from a red & pink paper 6x6 paper pad. The die I used to cut the squares is from Lawn Fawn Stitched Square die set. I lay out the die cuts. Once I was happy with the pattern, I adhered this to the white paper panel cut at 8 1/2" x 3 1/2", the size of a slimline card.

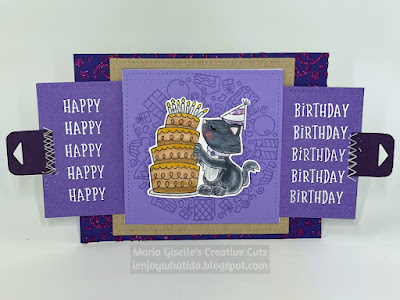
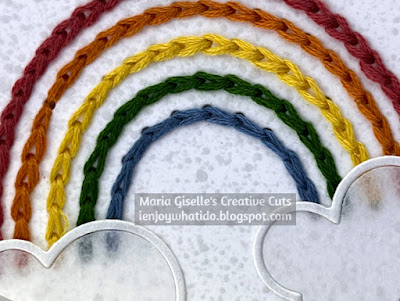
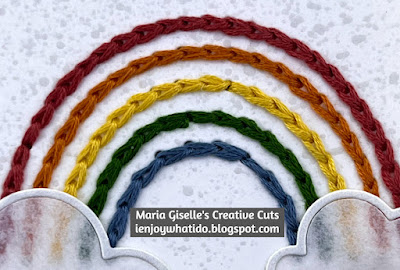
I added stitching accents to the top and bottom of the panel. I created the stitching holes using the We R Memory Keepers Sew Easy Stitch Piercer. I used DMC floss for the stitching.


For the sentiment, I die cut two hearts on a pink vellum. The heart die I used is from the Trinity Stamps Frame and Fold Die Set. I heat embossed the sentiment on one of this vellum hearts. The sentiment is from Ellen Hutson Totally Random Sayings Vol. 1 stamp set. The embossing powder I used is a Simon Says Stamp Rose Gold embossing powder. I adhered the other heart vellum on the back to make the heart less translucent. I die cut a white crepe paper using the Ellen Hutson Never Ending Fringe die. I adhered this to the back of the vellum heart. I shortened the fringes by trimming it. I adhered this to the panel. I adhered the digital image with foam tape. I added more details to the digital image using Nuvo drops and Ranger Glossy Accents.

Thank you for visiting my blog. I hope you join us in our monthlong challenge. Have a blessed, brilliant and creative day!

Maria Giselle B.

CHALLENGE SPONSORS


I am sharing this creation at


Wednesday, January 26, 2022

Sketch Inspired Surprise Card, See Interactive Feature Video


Hello! It is my sister's birthday today. Happy Birthday, Sis! What a great reason to create a card, right? This card is all about her. Her favorite color is purple. Her favorite cat, although she loves all of her cats, is Bibi, her black cat. She celebrated her birthday with an apple pie. The cake image is not an apple pie but I colored it like an apple pie. 

This card is my interpretation of Newton's Nook Designs sketch for their blog's latest challenge. You can see the sketch below. I added an interactive feature to the sketch by adding a surprise message when you pull out the tabs.


The focal image is from Newton's Nook Loves Cake stamp set. This was colored with Copic markers.


The background and sentiment is from the NN Birthday Roundabout stamp set. 

I used the NN Confetti stencil to add glittered paste to the background panel. Below is a video showing this card's interactive feature.


I hope you like my card. Thank you for visiting my blog. Have a blessed, brilliant and creative day!

Maria Giselle B.

I am sharing this creation at

Simon Says Stamp Blog~Anything Goes


Saturday, January 22, 2022

3D Display Card

Hello! Welcome back to my blog. I know it is way past the holidays, but it is never too early to create holiday cards.

I am using the following Mama Elephant products:

  • Lunar Animals stamp & die sets
  • Arctic Penguins stamp & die sets (for the Santa hat)
  • Columbus Circle die set
  • Happy Everything stamp set.
The Chinese New Year will be celebrated on February 1. It will be the Year of the Tiger, thus, explains why the cat is at the center stage. 


Thank you for visiting my blog. Have a blessed, brilliant and creative day!

Maria Giselle B.

I am sharing this creation at


Saturday, January 15, 2022

Stitched Rainbow Greeting Card (New to My Stash #21)


Hello! Welcome back to another New to My Stash post in which I feature a product that I newly acquired. I love to stitch and now that I can do it on paper, the more I will love to do it. For this post, the new items I added to my craft stash is The Stamp Market Dotted Rainbow Die and the Lawn Fawn Simple Puffy Cloud Frames. 

I die cut the rainbow on a white cardstock sized at 4 1/4" x 5 1/2". The layout of the rainbow is inspired by the latest MFT Sketch Challenge which you can see below. I did a chain link stitched to add stitching to the rainbows using DMC embroidery floss.

I sprayed some Prima Color Bloom Storm Cloud on the panel. I set this aside to dry while I die cut the clouds.

I die cut the cloud on a pearl white cardstock and a translucent paper. I adhered the pearl cloud frame die cut on the base of the rainbow. I pieced in the translucent cloud die cut to the cloud frame.

For the sentiment, I heat embossed it using Versafine Onyx Black ink and clear embossing powder. The sentiment is from My Favorite Things Cheerful Blessing stamp set. 


Thank you for visiting my blog. Have a blessed, brilliant and creative day!

Maria Giselle B.

I am sharing this creation at


Friday, January 14, 2022

Coffee Cup Shaped Bottom Fold Card


Hello! I am a Guest Designer at Coffee Loving Cardmakers Blog. I am so glad to be a given a chance to do this.

I used the Honey Bee Coffee Cup Gift Card Holder to cut the coffee cup. Even though this die is intended to create a gift card holder, it does not mean we cannot create other things using this die, right? I enjoy creating new things out of specialty dies.

I usually sketch my plan before I start creating. It makes the process easy for me. I did a bit of partial die cutting to achieve the layers I need to create the cup. 


I cross stitched a heart on a cardstock. The holes were created using a Paper Smooches Cross Stitch die. I traced a heart on the holed panel and used this as a guide in stitching the heart. I am using a variegated DMC floss. I adhered a scrap heart die cut on the back of the stitched to heart to keep the stitching secure. I then carefully fussy cut the heart, making sure I don't cut any cross stitching.

I heat embossed the sentiment on vellum using Versafine Onyx Black ink and clear embossing powder. The sentiment is from the Honey Bee Perfect Blend stamp set. Using a scrap cross stitched holed panel as a guide, I poked holes on the vellum around the sentiment. I trimmed off the excess on the sides of the sentiment strip. I stitched a silver floss to create a frame around the sentiment and at the same time, secure the vellum sentiment strip to the stitched heart. 

I die cut arms using the Honey Bee Paper Hugs Honey Cuts. I layered each arm with two die cuts for some dimension. I adhered the arms to the heart with a liquid adhesive.

I hope you like this shaped card I created. The sentiment I chose for this card means a lot to me. I feel like I created this card to give to myself because I needed someone to say this to me during this time. How about you? Have you had moments like this when you feel that the card you have created is actually for yourself?

Thanks for visiting my blog. Thank you again, Amy for this great opportunity of allowing me to be a guest designer at Coffee Loving Cardmakers Blog. Have a blessed, brilliant and creative day!

Maria Giselle B.

I am sharing this creation at


Wednesday, January 5, 2022

Papercrafter's A Year in Review 2021 Blog Hop Giveaway Winner

Hello! Welcome back. Thank you for your kind comments and sharing to me your favorite/s among my Top 5 Most Visited Blog Posts. To choose the winner, I assigned a number to each commenter, assigning #1 to the first commenter, #2 to the second commenter, and so on, and so forth. Using Google Random Generator, the winner is:


Congratulations, Mummylade! You are the winner of a $25 gift card from a crafting store of your choice. Please email me, gmbatan@gmail.com, with the Blog Hop Winner as subject. Please let me know in your email the store of your choice.

Life has been busy so I have not crafted since the year started. Hope you stick around and look forward to my first project of 2022.

Have a blessed, brilliant and creative day!
Maria Giselle B.


Wednesday, December 29, 2021

Color Inspired New Year's Card


Hello! Welcome back! Today's post will be short and hopefully, sweet. I received several Christmas cards on the eve that I was not able to mail out response Christmas cards since I know that Christmas is over by the time they receive my card. So I worked on creating a Happy New Year's card. The colors are inspired by the latest Color Hues challenge. Although they are traditional Christmas colors, it does not mean you cannot use this color combination for other occasions. Changing up the shade of red and green makes a difference. 

Like a mentioned, this is a very short post. Let us all pray for a better year this 2022! Thank you for visiting my blog. Have a blessed, brilliant and creative day!

Maria Giselle B.

I am sharing this creation at