
This image is very pretty and needs a lot of patience to color. The colored image in this card is my second colored image. I messed up fuzzy cutting the first one. I was trying to cut it on the line but later on realized that this is kind of hard having her hair twirled here and there. So with the one in the card, I left a small white border around the image. Believe it or not, I wasted more cardstock trying to cut the shell-shaped card with the Cricut Explore.
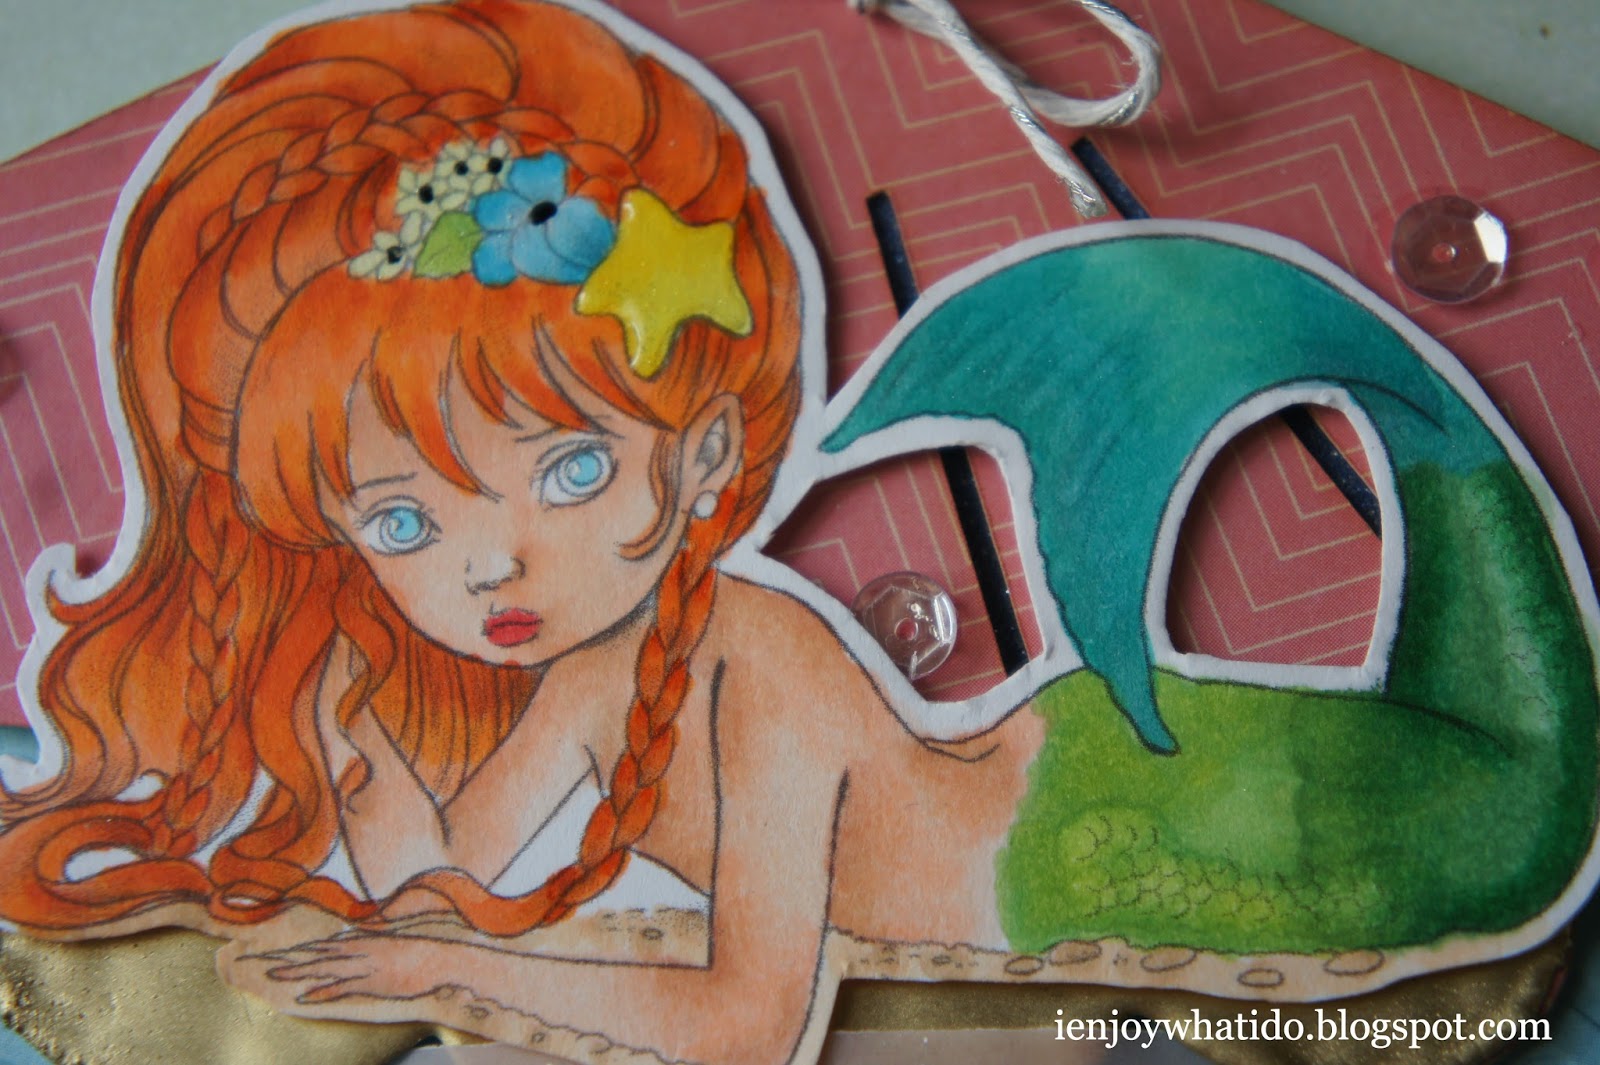
I started off by printing the image, then coloring it with Copic. The colors I used are listed at the bottom of this post. I was trying to color the mermaid like Ariel, The Little Mermaid. I searched the web for any Copic coloring of Ariel but nothing popped up. I colored her my Ariel way. When I showed the colored image to my sons and asked them who the mermaid is, they all answered Ariel. Their approval is good enough for me.
I applied clear Wink of Stella to the star and flower accents on the mermaid's hair, and to the mermaid's fin. I emphasized the eyes with a dot of white Sakura Gelly Roll pen. I added some dots of black Sakura Glaze Gelly Roll pen on the flowers. I covered the blue flower with Ranger Glossy Accents and allowed this to dry.
I applied clear Wink of Stella to the star and flower accents on the mermaid's hair, and to the mermaid's fin. I emphasized the eyes with a dot of white Sakura Gelly Roll pen. I added some dots of black Sakura Glaze Gelly Roll pen on the flowers. I covered the blue flower with Ranger Glossy Accents and allowed this to dry.
I cut the shaped card with the help of the Cricut Explore. The image is from Cricut Create A Critter. I used the digital canvas of the Cricut Design Space to help me size the shell. This cut image only comes with two layers. I duplicated the base layer and welded two images to create the base card. I cut the top layer using a pink patterned paper. I cut the bottom layer using a light blue cardstock. I cut the shell-shaped cardbase using kraft cardstock.
As I've mentioned, I have a lot of scraps with this project. I needed a ground for the mermaid to lay on so it doesn't seem like she's floating. I cut one of the scrap shells and heat embossed it with gold Wow! Ultra High Embossing powder. I embossed this twice to make it really raised.
For the pink layer, I inked this with Tim Holtz Distress Ink in Old Paper & Tea Dye. I dry embossed the blue layer using Lifestyle Crafts Jubilant embossing folder. I inked the edges using TH Distress Ink in Peacock Feathers. I adhered some glittered tape onto the blue layer, long enough to show through the slits on the pink layer.
I adhered the gold embossed layer onto the pink layer using Skor-tape. This layer needs a strong adhesive due to the weight of the embossing. I adhered the mermaid on top of this using foam adhesive for dimension. I adhered the pink layer onto the blue layer. I added a twine on top of the shell. I used a Lawn Fawn Gold Sparkle Trimming. I taped the twine on the back to keep it secure. Once I am happy with the bow, I squirted Ranger Multi Matte Medium glue on the knot. I dried this by clipping it with a tweezer. I also adhered clear Pretty Pink Posh sequins randomly to the lay-out. Once this is dry, I adhered this panel to the kraft shell-shaped card base.
For the sentiment, I combiined sentiments from Hampton Arts Doodlebug Design Clear Word Greeting stamp set and Avery Elle Peonies stamp set. I heat embossed this using white Hero Arts embossing powder. I embossed this on a pink vellum strip. I adhered the end of this strip to the bakc of the embossed piece using mini glue dots.

Thanks for visiting my blog. Have a blessed & brilliant day!
Maria Giselle B.
Copic Markers used:
Hair-YR04, YR65, YR68
Skin-E000, E01, E11, E21
Fin-YG03, YG13, G07, G12, BG15, BG34
Eyes-BG01
Flowers-Y00, BG01, BG05
Star-Y04, Y08, Y35
Sand-E31, E51, E53

I am sharing this creation to:


For the pink layer, I inked this with Tim Holtz Distress Ink in Old Paper & Tea Dye. I dry embossed the blue layer using Lifestyle Crafts Jubilant embossing folder. I inked the edges using TH Distress Ink in Peacock Feathers. I adhered some glittered tape onto the blue layer, long enough to show through the slits on the pink layer.
I adhered the gold embossed layer onto the pink layer using Skor-tape. This layer needs a strong adhesive due to the weight of the embossing. I adhered the mermaid on top of this using foam adhesive for dimension. I adhered the pink layer onto the blue layer. I added a twine on top of the shell. I used a Lawn Fawn Gold Sparkle Trimming. I taped the twine on the back to keep it secure. Once I am happy with the bow, I squirted Ranger Multi Matte Medium glue on the knot. I dried this by clipping it with a tweezer. I also adhered clear Pretty Pink Posh sequins randomly to the lay-out. Once this is dry, I adhered this panel to the kraft shell-shaped card base.
For the sentiment, I combiined sentiments from Hampton Arts Doodlebug Design Clear Word Greeting stamp set and Avery Elle Peonies stamp set. I heat embossed this using white Hero Arts embossing powder. I embossed this on a pink vellum strip. I adhered the end of this strip to the bakc of the embossed piece using mini glue dots.
Thanks for visiting my blog. Have a blessed & brilliant day!
Maria Giselle B.
Copic Markers used:
Hair-YR04, YR65, YR68
Skin-E000, E01, E11, E21
Fin-YG03, YG13, G07, G12, BG15, BG34
Eyes-BG01
Flowers-Y00, BG01, BG05
Star-Y04, Y08, Y35
Sand-E31, E51, E53
Image Sponsor
Fabulous make. Thanks for joining us in our Anything Goes challenge at Graph’It Markers Colouring Challenge
ReplyDeleteAnjie (DT)
This is a really sweet image and I love the colours. I do agree with you that fussy cutting is really hard to do and takes me aaaaages! Thank you so much for entering the Crafts Galore Encore (use a Digi or Stamp) Challenge this month, lots of luck to you. Hugs Sue Pxxx DT
ReplyDeletelovely make
ReplyDeleteThanks for joining us in our Anything Goes challenge at Graph’It Markers Colouring Challenge
xx